
The router restart wireless printer technique solves almost every wireless printing issue you’ll encounter. When your printer suddenly won’t connect, prints slowly, or drops offline constantly, this simple trick brings it back to life. Tech support professionals use this method first because it works so reliably.
Most people restart their printer when problems occur. That’s good but incomplete. Your router holds the key to wireless printer stability. It manages connections, assigns addresses, and routes data between devices. When this system gets confused, your printer becomes unreachable.
In this guide, you’ll learn exactly how to perform the router restart trick correctly. You’ll understand why this wireless printer problems solution works so effectively. More importantly, you’ll discover when to use it and how to prevent future connection issues. Let’s fix your wireless printing frustration permanently.
What Is the Router Restart Wireless Printer Method?
The router restart wireless printer method involves restarting both devices in a specific sequence to reset network connections completely. This technique clears corrupted network tables, refreshes IP addresses, and re-establishes clean communication channels between your printer and router.
Your router maintains a table of connected devices with their assigned IP addresses. Over time, this table gets cluttered with old entries, duplicate addresses, and conflicting information. Your printer might have three different IP addresses listed, confusing your router about which one is current.
Network conflicts happen when multiple devices want the same IP address. Your printer connects fine initially but later another device claims that address. Your router gets confused and blocks your printer’s connection. This creates the “printer offline” error everyone hates.
The restart sequence forces your router to rebuild its device table from scratch. Your printer requests a fresh IP address and gets registered properly. All old conflicts disappear. The connection starts clean without any historical baggage.
This fix wireless printer approach works because it addresses the root cause rather than symptoms. While other fixes target your printer, this method repairs the communication infrastructure. When the network foundation is solid, printing problems vanish naturally.
The Complete Router Restart Wireless Printer Process
Step 1: Turn Off Your Wireless Printer First
Power down your printer using its power button. Don’t just unplug it yet. Let the printer shut down properly first. This ensures it closes all network connections gracefully and saves any pending settings.
Wait for all lights on your printer to turn off completely. Some printers take 10-15 seconds to fully shut down. The display should go dark and all indicator lights should extinguish. Rushing this step can leave connections in an unstable state.
After the printer is completely off, unplug the power cable from the back of the printer. This ensures total power loss and complete memory clearing. Some printers maintain partial power even when turned off through the button.
Leave your printer unplugged while you work on the router. This creates a clean restart sequence. Your printer won’t try reconnecting while your router is still confused about network assignments.
Step 2: Restart Your Router Properly
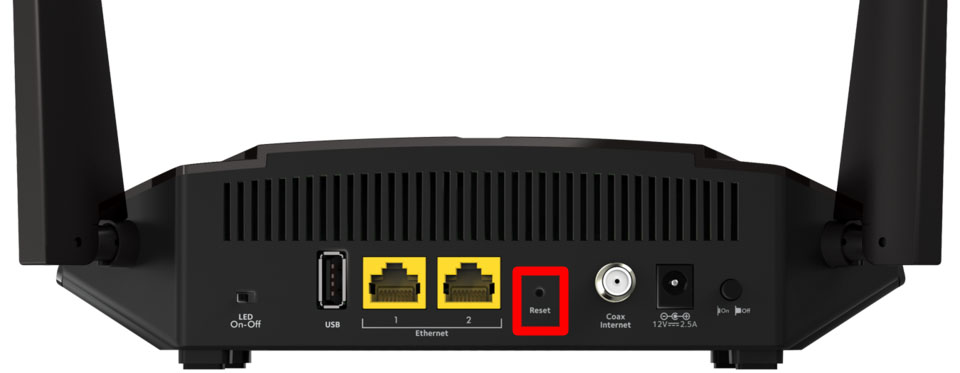
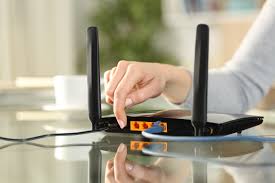
Locate your router’s power button or power cable. Most routers don’t have power buttons, so you’ll need to unplug the power adapter. Remove the plug from the router itself, not from the wall outlet, for best results.
Wait a full 30 seconds with your router completely unplugged. This duration is critical. Your router contains capacitors that store electrical charge. The 30-second wait ensures complete discharge and memory clearing. Shorter waits leave residual data that perpetuates problems.
While waiting, your router releases its DHCP leases. These are the IP address assignments to devices. When you restart, your router will issue fresh addresses without conflicts. This is why the router restart wireless printer method works so effectively.
After 30 seconds, plug your router back in. Watch the lights as it boots up. The process usually takes 1-2 minutes. Wait for your internet light to show solid green or blue, indicating full connectivity. Don’t rush to the next step until your router completes initialization.
Step 3: Wait for Router to Fully Initialize
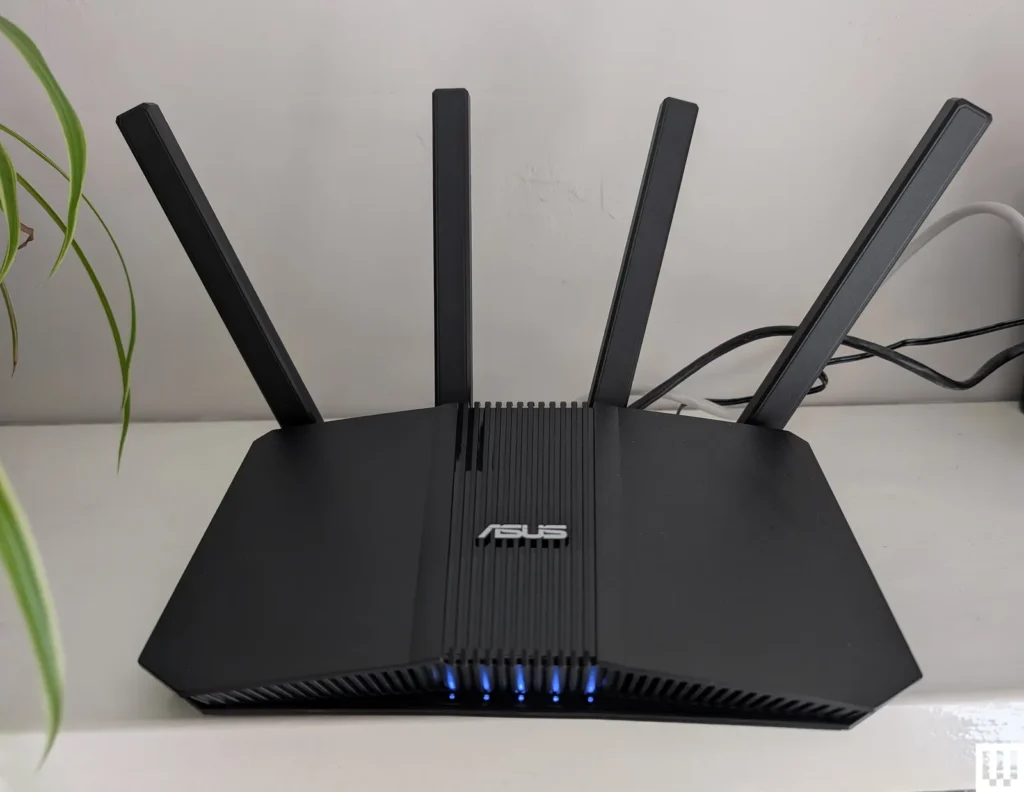
Your router goes through several startup phases. First, it powers on and runs self-diagnostics. Then it establishes internet connection with your modem. Finally, it activates wireless networks and prepares to accept device connections.
Check your router’s lights for specific status indicators. Most routers have lights for power, internet, and wireless signals. All should show solid colors, not flashing or amber. Flashing lights mean the router is still working through startup processes.
During initialization, your router rebuilds its firmware, loads settings, and prepares network tables. This foundation work is essential. Connecting devices too early interrupts this process and causes new problems.
Many wireless printer problems stem from impatience here. People restart the router and immediately try connecting devices. Give your router the full two minutes it needs. This patience prevents creating new connection issues while fixing old ones.
Step 4: Power On Your Wireless Printer
After your router shows stable operation, plug your printer back in. Press the power button to turn it on. Your printer will begin its own startup sequence, initializing hardware and loading firmware.
Watch your printer’s display as it boots. Modern printers show startup progress on their screens. Wait for the home screen or “Ready” message. This indicates your printer completed internal initialization and is prepared to connect to networks.
Your printer’s wireless light might flash during startup. This is normal. The printer is scanning for available networks. Once it finds your network, it attempts to reconnect automatically using saved credentials.
Don’t send print jobs yet. Let your printer complete its connection process first. You’ll know connection succeeded when the wireless light shows solid (not flashing) and your printer displays “Connected” or shows network signal bars.
Step 5: Verify Network Connection
Check your printer’s network settings through its control panel. Navigate to wireless or network settings menu. Look for the connected network name and IP address. These should display clearly if connection succeeded.
Print a network configuration page from your printer’s menu. This page lists all network details including IP address, subnet mask, and router connection. Keep this page for reference. It’s useful for troubleshooting future issues.
From your computer, try adding the printer again if it doesn’t appear automatically. Go to Settings > Devices > Printers & Scanners. Click “Add a printer or scanner.” Your computer should discover your printer on the network now.
Send a test print to verify everything works. Choose a simple document first, not a complex photo. A test page confirms your router restart wireless printer fix worked completely. If the page prints successfully, your problem is solved.
Step 6: Set Static IP Address (Optional but Recommended)
Dynamic IP addresses change periodically, causing connection loss. Setting a static IP prevents this problem permanently. Access your router’s admin panel through a web browser by typing your router’s IP address (usually 192.168.1.1 or 192.168.0.1).
Log in with your router credentials. Navigate to DHCP settings or connected devices section. Find your printer in the device list. Look for an option like “Reserve IP” or “Static DHCP.”
Select your printer and assign it a permanent IP address. Choose an address outside your router’s dynamic DHCP range to avoid conflicts. For example, if your DHCP range is 192.168.1.100-200, assign your printer 192.168.1.50.
Save the settings and restart both your router and printer one more time. This final restart locks in the static IP assignment. Your printer will maintain this address permanently, eliminating future connection problems caused by address changes.
Advanced Tools for Wireless Printer Stability

Wi-Fi Analyzer Apps: Download apps like Wi-Fi Analyzer (Android) or NetSpot (iOS/Windows) to check your wireless signal strength. These tools show which Wi-Fi channels are congested in your area. Switching to a less crowded channel improves printer connectivity significantly.
Router Quality of Service (QoS) Settings: Modern routers offer QoS features that prioritize certain traffic types. Set your printer’s IP address as high priority in your router’s QoS settings. This ensures print jobs receive bandwidth even when your network is busy with streaming or downloads.
Network Extenders and Mesh Systems: If your printer sits far from your router, weak signal causes connection problems. Wi-Fi extenders boost signal to distant areas. Mesh systems like Google Nest WiFi or Eero provide whole-home coverage that eliminates weak spots completely.
Printer Network Management Software: HP Smart, Canon Print, and Epson Connect apps monitor your printer’s network status. These free tools send alerts about connection issues and provide one-tap reconnection options. They simplify wireless printer management significantly.
Common Mistakes When Using Router Restart Wireless Printer Fix
Restarting in Wrong Order: Many people restart their printer and router simultaneously. This creates timing problems. Devices might try connecting before the network is ready. Always restart the router first, let it initialize completely, then power on your printer.
Not Waiting Long Enough: The most common error is impatience. People wait 5-10 seconds instead of the full 30 seconds for routers. This short wait doesn’t clear all network tables. Residual data causes the same problems to return immediately.
Skipping the Static IP Step: While not required, static IP addresses prevent 90% of recurring wireless printer problems. People fix the immediate issue but ignore this preventive measure. A week later, they’re troubleshooting the same problem again.
Connecting to Wrong Network Band: Dual-band routers broadcast both 2.4GHz and 5GHz networks. Some older printers only support 2.4GHz. Attempting connection to 5GHz fails silently. Always verify which band your printer supports and connect to the compatible one.
Ignoring Router Firmware Updates: Outdated router firmware contains bugs that disrupt device connections. Router manufacturers release updates to fix these issues. Check for router firmware updates monthly and install them during off-hours.
Placing Printers Too Far from Router: Physical distance weakens Wi-Fi signals. Walls, metal objects, and appliances interfere with wireless signals too. Microwaves and baby monitors especially disrupt 2.4GHz connections. Position your printer within 25 feet of your router with minimal obstacles.
Using Incorrect Network Password: After a router restart, you might need to reconnect your printer manually. Entering the wrong password wastes time and causes frustration. Keep your network password accessible and verify you’re entering it correctly, watching for case sensitivity.
Frequently Asked Questions
How often should I restart my router for wireless printer health?
Restart your router monthly as preventive maintenance even when problems aren’t occurring. This clears accumulated network table errors before they cause issues. For active households with many devices, weekly restarts keep networks running smoothly. The router restart wireless printer method works best as prevention, not just reaction to problems.
Why does my wireless printer go offline even after the router restart?
If problems persist after the router restart wireless printer fix, check for IP address conflicts, outdated printer firmware, or router compatibility issues. Some older printers struggle with newer router security protocols like WPA3. Switch your router to WPA2 temporarily to test compatibility. Also verify your printer’s firmware is current.
Can I just restart the router without restarting my printer?
For best results, restart both devices in sequence. Only restarting the router might work temporarily but leaves corrupted data in your printer’s network memory. The complete router restart wireless printer process ensures both devices refresh their network stacks completely. This thoroughness provides more reliable, long-lasting fixes.
What if my printer won’t reconnect after the router restart?
First, verify your Wi-Fi network name and password haven’t changed. Run your printer’s wireless setup wizard to reconnect manually. Check that your router’s wireless is enabled and broadcasting. Some routers disable wireless after restarts until you confirm settings. Also ensure you’re connecting to the correct frequency band (2.4GHz vs 5GHz) for your printer model.
Conclusion
The router restart wireless printer technique is your most powerful tool for fixing wireless printer problems. This simple process solves connection issues, offline errors, and sluggish printing faster than any other method. The key is following the correct sequence and allowing adequate time for both devices to initialize properly.
Remember the essential steps: turn off your printer first, unplug your router for 30 seconds, wait for full router initialization, then power on your printer. This sequence ensures clean connections without conflicts. Adding a static IP address prevents future problems from developing.
Make this fix wireless printer method part of your monthly maintenance routine. Regular restarts prevent issues before they interrupt your work. Your printer will maintain stable connections and reliable performance. No more frustrating “printer offline” messages or failed print jobs. Take control of your wireless printing today with this proven router restart wireless printer solution.
Printer Eats First Page? Stop This Annoying Problem in Minutes Today Read More.


