
Introduction
This comprehensive printer troubleshooting guide is designed specifically for beginners who feel overwhelmed when their printer stops working properly. You’re not alone – millions of people struggle with printer issues daily, from mysterious error messages to frustrating paper jams that seem impossible to clear.
The good news is that 90% of common printer problems can be solved with simple, step-by-step solutions that don’t require technical expertise or expensive repair services. Most issues stem from basic maintenance oversights, incorrect settings, or simple connectivity problems that anyone can fix.
Whether you’re dealing with a home inkjet printer, a laser printer in your small office, or trying to help a family member with their printing woes, this guide breaks down complex technical problems into manageable, easy-to-follow solutions.
By the end of this tutorial, you’ll have the confidence to diagnose and fix the most common printer issues, saving time, money, and the frustration that comes with unreliable printing equipment.
What Is Basic Printer Troubleshooting?
Basic printer troubleshooting is the process of identifying and resolving common printing problems using simple, systematic steps that don’t require advanced technical knowledge. It focuses on addressing the most frequent issues that prevent printers from working correctly, such as connectivity problems, print quality concerns, and mechanical malfunctions.
This approach emphasizes starting with the simplest solutions first, often called the “low-hanging fruit” method. Many printer problems result from minor issues like loose cables, empty ink cartridges, or incorrect paper loading rather than serious hardware failures.
Effective troubleshooting follows a logical sequence: checking physical connections, verifying supplies and settings, testing basic functions, and gradually progressing to more specific solutions. This methodical approach prevents wasting time on complex fixes when simple adjustments could resolve the problem.
The key principle is that most printer issues fall into predictable categories with established solutions. Understanding these patterns helps beginners quickly identify which type of problem they’re facing and apply the appropriate fix without getting overwhelmed by technical details.
6 Simple Steps to Fix Common Printer Issues
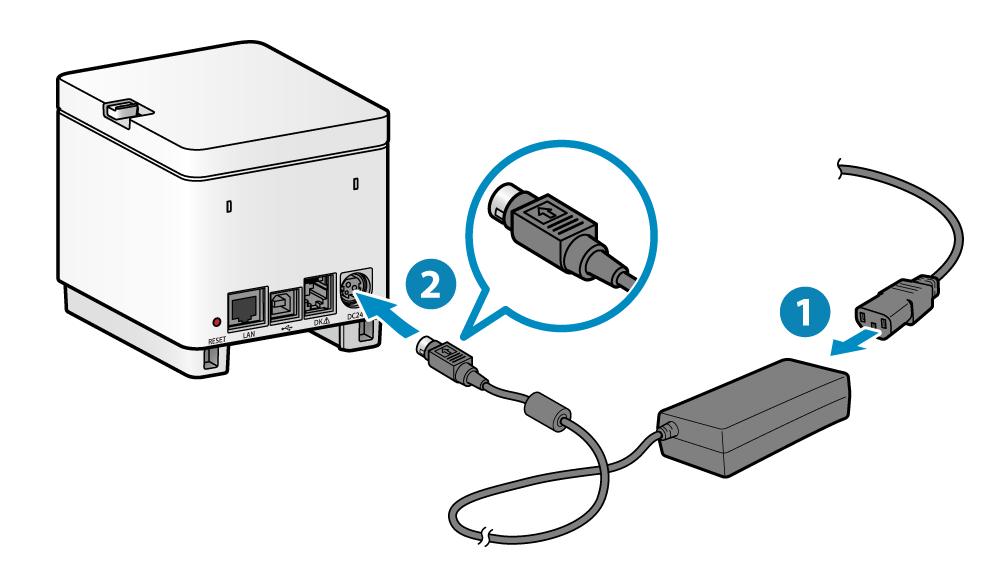
Step 1: Check Power and Basic Connections (The Foundation Fix)
Start with the absolute basics that solve surprising numbers of printer problems. Ensure your printer is plugged into a working power outlet and that the power cord is securely connected to both the wall and the printer.
Check that the power button is pressed and that any power indicators show the printer is receiving electricity. If you’re using a power strip, try plugging directly into the wall outlet to eliminate power strip failures.
For USB-connected printers, unplug and reconnect the USB cable at both ends. Try different USB ports on your computer, preferably USB 2.0 or higher ports. Loose connections cause many mysterious printing failures that seem like complex technical problems.
Step 2: Verify Paper Loading and Remove Jams
Open your printer and check that paper is loaded correctly in the input tray. Paper should be aligned against the guides without being too tight or too loose. The paper stack shouldn’t exceed the maximum fill line indicated in your tray.
If you suspect a paper jam, turn off the printer before attempting removal. Open all accessible panels and gently remove any visible paper, including small torn pieces. Pull paper in the direction it normally travels to avoid damaging internal mechanisms.
Check for foreign objects like paper clips, staples, or torn label pieces that might obstruct the paper path. Even tiny obstructions can cause repeated jams and printing failures.
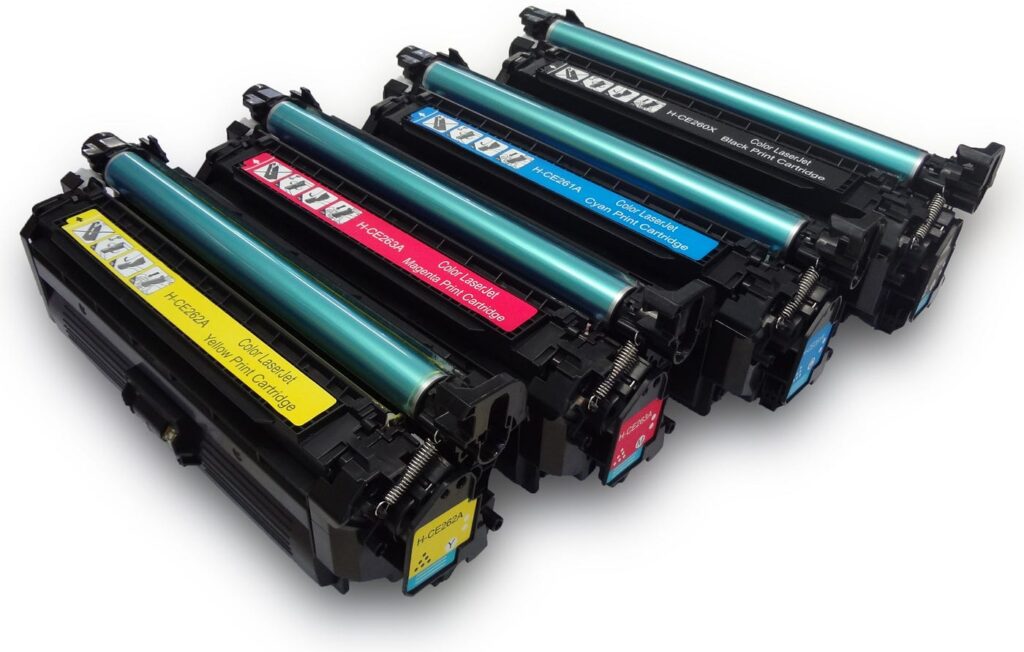
Step 3: Examine Ink or Toner Levels and Cartridge Installation
Low or empty cartridges cause various printing problems beyond just faded output. Check ink or toner levels through your printer’s display panel or computer software. Replace cartridges that show low levels, as inconsistent ink flow can cause streaking and poor quality.
Remove and reinstall cartridges to ensure proper seating. Many “cartridge error” messages result from cartridges that aren’t fully inserted or have protective tape still attached. Look for and remove any orange or yellow tape on new cartridges.
Clean cartridge contacts with a dry, lint-free cloth if you see “cartridge not recognized” errors. Dirty contacts prevent proper communication between cartridges and the printer.
Step 4: Run Built-in Diagnostic and Cleaning Functions
Most modern printers include automatic diagnostic tools accessible through the control panel or printer software. These tools can identify and often fix many common problems without manual intervention.
Use the print head cleaning function if you notice streaking, missing colors, or faded output. This process clears clogged nozzles that prevent proper ink flow. Run cleaning cycles 2-3 times if initial attempts don’t improve print quality.
Print test pages to evaluate current performance and identify specific problems. Test pages reveal issues with color accuracy, alignment, and print quality that might not be obvious in regular documents.

Step 5: Update Drivers and Check Software Settings
Outdated or corrupted printer drivers cause many connectivity and printing problems. Visit your printer manufacturer’s website to download the latest drivers for your specific model and operating system.
Uninstall old printer software before installing new drivers to prevent conflicts. Use your computer’s “Add or Remove Programs” feature to completely remove previous installations.
Check that your printer is set as the default printer in your computer’s settings. Multiple installed printers can cause documents to be sent to the wrong device or create confusion in print queues.
Step 6: Restart Everything and Test Connectivity
When other solutions don’t work, restart both your printer and computer to clear temporary glitches and reset communication protocols. This simple step resolves approximately 25% of printing problems by clearing memory buffers and resetting network connections.
For wireless printers, check that your WiFi network is working properly and that the printer shows a strong connection signal. Print a network configuration page from your printer to verify connection status and IP address assignment.
Test printing a simple document like a plain text file to verify basic functionality before attempting complex print jobs with images or special formatting.
Essential Tools and Resources for Beginner Printer Problems
Beyond basic troubleshooting, several free tools can help diagnose and resolve printer issues more effectively. Most printer manufacturers provide dedicated diagnostic software like HP Print and Scan Doctor or Canon My Printer, which automatically detect and fix common problems.
Your computer’s built-in troubleshooting tools can also identify driver conflicts and connection issues. Windows includes a printer troubleshooter accessible through Settings > Update & Security > Troubleshoot that walks through common solutions systematically.
Keep your printer manual or download a digital copy from the manufacturer’s website. Manuals contain model-specific error code explanations and troubleshooting steps that generic guides can’t provide.
Online resources like manufacturer support forums and video tutorials offer visual guidance for complex procedures. YouTube contains thousands of printer-specific tutorials that show exactly how to perform maintenance tasks and resolve particular problems.

Common Mistakes That Make Easy Printer Fixes Harder
Many beginners make printer problems worse by forcing solutions instead of following systematic approaches. Forcing jammed paper out can damage feed mechanisms, while randomly changing settings often creates new problems without solving the original issue.
Ignoring error messages and warning lights leads to more serious problems. These indicators provide specific information about what’s wrong, and addressing them promptly prevents minor issues from becoming major repairs.
Using incompatible or low-quality paper and ink creates ongoing problems that seem like printer malfunctions. Stick to manufacturer-recommended supplies, especially for inkjet printers that are sensitive to ink chemistry and paper thickness.
Cleaning printers with inappropriate materials can cause permanent damage. Avoid alcohol-based cleaners on plastic components and never use compressed air on inkjet print heads, as it can force debris deeper into delicate mechanisms.
Many people skip regular maintenance until problems occur. Simple monthly tasks like print head cleaning and dust removal prevent most common issues from developing in the first place.
Another frequent mistake is attempting multiple solutions simultaneously, making it impossible to identify which fix actually worked. Apply one solution at a time and test results before trying additional measures.
Frequently Asked Questions
What should I do first when my printer won’t print anything? Start with basic checks: ensure the printer is powered on, connected properly, and has paper and ink. Check that your computer recognizes the printer and that no error lights are blinking on the printer itself.
How often should I clean my printer to prevent problems? Perform basic maintenance monthly for regular users, including print head cleaning and exterior dusting. If you print infrequently, clean before heavy use periods and whenever you notice print quality declining.
Why does my printer say it’s offline when it’s clearly connected? “Printer offline” messages usually indicate communication problems between your computer and printer. Try restarting both devices, checking cable connections, or reinstalling printer drivers to restore communication.
Can I use generic ink cartridges without causing problems? While generic cartridges work in many printers, they may cause compatibility issues or void warranties. If you choose generic options, buy from reputable suppliers and be prepared to switch back to original cartridges if problems occur.
Conclusion
This printer troubleshooting guide provides you with the essential knowledge and confidence to handle the most common printing problems without professional help. Remember that systematic approaches work better than random attempts, and most issues have simple solutions when you know where to look.
The six-step process outlined here addresses approximately 80% of typical printer problems, from basic connectivity issues to print quality concerns. By starting with simple checks and progressing logically through more specific solutions, you can resolve most problems quickly and efficiently.
Regular maintenance prevents many issues from occurring, making your printing experience more reliable and less frustrating. Keep this guide bookmarked for quick reference, and don’t hesitate to consult manufacturer resources for model-specific problems.
With practice, these troubleshooting skills will become second nature, transforming you from someone who dreads printer problems into someone who can confidently maintain and repair your printing equipment. Your newfound expertise will save time, money, and considerable stress in both personal and professional settings.
Printer Error Troubleshooting: Fix Common Issues in Minutes Read More.


Recent Comments