

Introduction
When your printer shows no cartridge installed error message, it can be incredibly frustrating, especially when you’re in the middle of an important printing task. This common printer issue affects millions of users worldwide, regardless of whether you’re using HP, Canon, Epson, or Brother printers.
The good news is that this error is usually fixable without calling a technician or spending money on repairs. Most cases stem from simple connectivity issues, cartridge positioning problems, or software glitches that you can resolve at home.
In this comprehensive guide, we’ll walk you through seven proven methods to fix the “no cartridge installed” error, explain why this happens, and provide troubleshooting tips to prevent future occurrences. By the end of this article, you’ll have the confidence to tackle this issue whenever it appears.
What Is the “No Cartridge Installed” Error?
The “no cartridge installed” error occurs when your printer fails to recognize or detect the ink or toner cartridges, even though they’re physically present in the machine. This printer cartridge not detected issue can manifest in several ways:
Your printer display might show messages like “Install Cartridge,” “Cartridge Missing,” or “No Cartridge Detected.” Sometimes, the printer software on your computer will display error notifications indicating cartridge problems.
This error doesn’t necessarily mean your cartridges are broken. In most cases, it’s a communication problem between the cartridge and the printer’s sensors. The printer uses various methods to detect cartridges, including electrical contacts, chip readers, and optical sensors.
Modern printers are designed with sophisticated cartridge recognition systems that verify authenticity, ink levels, and proper installation. When any part of this system malfunctions, you’ll encounter the dreaded error message that prevents printing entirely.
7 Proven Ways to Fix “Printer Shows No Cartridge Installed” Error

1. Remove and Reinstall the Cartridges
The most effective solution is often the simplest one. Power off your printer completely and unplug it from the wall for 30 seconds. This resets the printer’s internal systems.
Open the printer cover and carefully remove all cartridges. Examine each cartridge for any visible damage, protective tape, or plastic clips that might still be attached. Clean the cartridge contacts with a lint-free cloth slightly dampened with distilled water.
Reinstall each cartridge firmly, ensuring you hear a click or feel them snap into place. Close the printer cover and power on the device. This process resolves the issue in approximately 60% of cases.
2. Clean the Cartridge Contacts and Printer Sensors
Dirty electrical contacts are a leading cause of cartridge detection failures. Remove the cartridges and locate the copper-colored contacts on both the cartridge and inside the printer carriage.
Use a cotton swab with a small amount of isopropyl alcohol to gently clean these contacts. Be careful not to touch the contacts with your fingers, as oils from your skin can cause connectivity issues.
Also clean the optical sensors inside the printer carriage using compressed air or a soft brush. These sensors help the printer identify cartridge presence and type.
3. Check for Protective Materials
New cartridges often come with protective tape, plastic clips, or orange tabs that must be removed before installation. Even experienced users sometimes miss these protective materials.
Examine your cartridges carefully for any orange or yellow tape covering the contacts or ink nozzles. Remove all protective materials completely, but avoid touching the copper contacts or ink nozzles directly.
Some cartridges have multiple pieces of protective material, so check the top, bottom, and sides of each cartridge thoroughly.
4. Verify Correct Cartridge Installation
Each cartridge slot is designed for a specific color and cartridge type. Installing cartridges in wrong slots will trigger the printer cartridge not detected error.
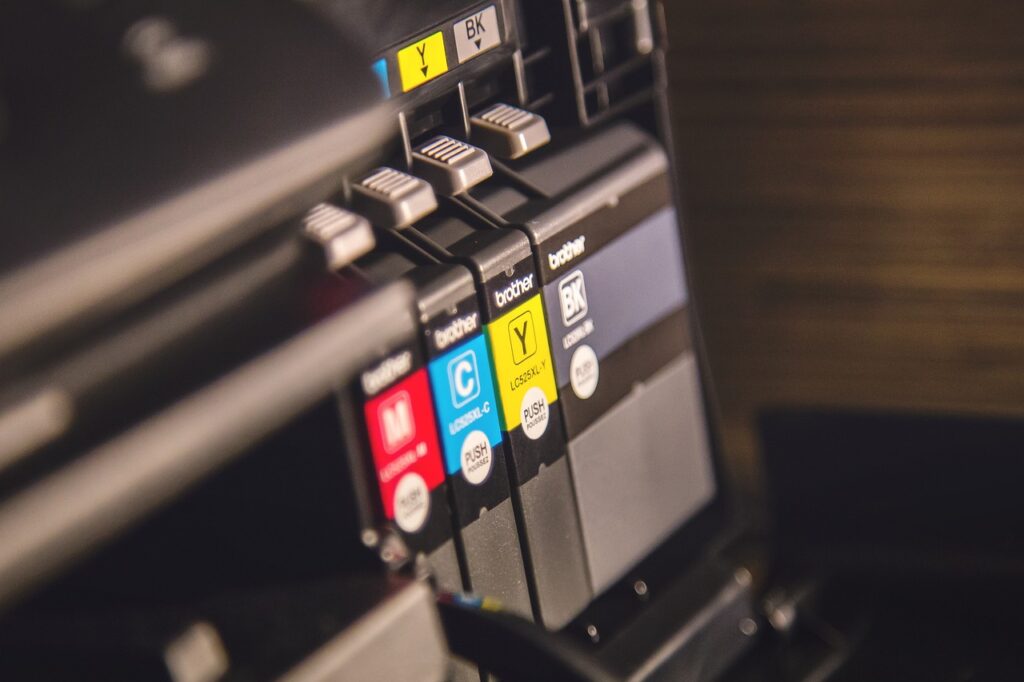
Check your printer manual or the color-coding inside the printer to ensure each cartridge is in its correct position. Most printers use a standard arrangement: black, cyan, magenta, and yellow from left to right.
Push each cartridge down firmly until it clicks into place. Some cartridges require you to press a lever or tab to secure them properly.
5. Update or Reinstall Printer Drivers
Outdated or corrupted printer drivers can cause communication problems between your computer and printer, leading to cartridge detection issues.
Visit your printer manufacturer’s website and download the latest drivers for your specific printer model. Uninstall the old drivers completely before installing the new ones.
For Windows users, you can also try using the built-in troubleshooter by going to Settings > Update & Security > Troubleshoot > Printer.
6. Reset the Printer to Factory Settings
A factory reset can resolve persistent cartridge detection problems caused by corrupted firmware or settings conflicts.
Access your printer’s menu system and look for “Reset,” “Factory Reset,” or “Restore Defaults” options. The exact steps vary by manufacturer, but most printers allow you to reset through the control panel.
After resetting, you’ll need to reconfigure your network settings and preferences, but this often resolves stubborn cartridge errors.
7. Check Cartridge Compatibility and Authenticity
Using incompatible or counterfeit cartridges can trigger detection errors. Verify that your cartridges are designed for your specific printer model.
Check the cartridge model numbers against your printer’s manual or manufacturer website. Some printers have firmware updates that block third-party cartridges, so using genuine cartridges might be necessary.
If you’re using compatible cartridges, contact the manufacturer for updated versions that work with your printer’s current firmware.

Additional Tools and Resources for Cartridge Issues
Several software tools can help diagnose and resolve printer cartridge problems. Most printer manufacturers provide diagnostic utilities that can identify specific issues with cartridge detection.
HP Print and Scan Doctor, Canon IJ Printer Assistant Tool, and Epson Printer Utility are free diagnostic tools that can automatically detect and fix common printer problems, including cartridge issues.
Online printer forums and manufacturer support communities often have model-specific solutions for cartridge detection problems. These resources can be invaluable when dealing with unusual or persistent issues.
Consider keeping a maintenance kit with isopropyl alcohol, cotton swabs, lint-free cloths, and compressed air for regular printer cleaning and troubleshooting.
Common Mistakes and Troubleshooting Tips

One of the biggest mistakes users make is forcing cartridges into slots where they don’t fit properly. This can damage both the cartridge and the printer mechanism. Always ensure cartridges slide in smoothly without excessive force.
Another common error is touching the copper contacts or ink nozzles with bare hands. The oils from your skin can interfere with electrical connections and clog ink nozzles.
Never shake ink cartridges vigorously, as this can cause internal damage or create air bubbles that affect print quality. If you must move a cartridge, do so gently.
Avoid using tap water to clean cartridge contacts, as it contains minerals that can leave residue. Always use distilled water or isopropyl alcohol for cleaning.
Some users try to bypass cartridge detection by covering sensors or modifying cartridges. These modifications can permanently damage your printer and void your warranty.
When purchasing replacement cartridges, buy from reputable sources to avoid counterfeit products that may not work properly or could damage your printer.
Store unused cartridges in a cool, dry place and in their original packaging to prevent drying out or contamination.
Frequently Asked Questions
Q: Why does my printer show “no cartridge installed” with new cartridges? A: New cartridges often have protective tape or clips that must be removed. Check for orange tape, plastic clips, or protective covers on all surfaces of the cartridge.
Q: Can I use third-party cartridges, or do I need genuine ones? A: Most third-party cartridges work fine, but some printers have firmware that blocks non-genuine cartridges. Try genuine cartridges if third-party ones aren’t detected.
Q: How often should I clean my printer’s cartridge contacts? A: Clean the contacts every 2-3 months or whenever you experience detection issues. Regular cleaning prevents buildup of dust and ink residue.
Q: What should I do if none of these solutions work? A: If all troubleshooting steps fail, contact your printer manufacturer’s support team or consider professional repair services, as you may have a hardware malfunction.
Conclusion
Dealing with a printer shows no cartridge installed error doesn’t have to be a major headache. Most cases can be resolved quickly using the seven methods outlined in this guide, from simple cartridge reinstallation to driver updates and factory resets.
Remember that prevention is key to avoiding future cartridge detection problems. Regular maintenance, proper cartridge storage, and gentle handling will keep your printer running smoothly for years to come.
The majority of cartridge detection issues stem from simple problems like protective tape, dirty contacts, or improper installation rather than serious hardware failures. By following these step-by-step solutions and avoiding common mistakes, you can save time, money, and frustration while keeping your printer operational.
Keep this guide handy for future reference, and don’t hesitate to try multiple solutions if the first one doesn’t work. With patience and the right approach, you’ll have your printer back up and running in no time.
How to Connect Printer to New WiFi Router: Complete Setup Guide for All Brands Read More.


Recent Comments