
The 30-Second Summary
Your printer stopped working after installing a new router or changing Wi-Fi settings. Fix it now:
- Reconnect printer to new Wi-Fi network using WPS button – Works in 90 seconds for 80% of printers
- Update printer port on computer to match new IP address – Fixes “offline” status after network change
- Delete old printer, re-add using new network credentials – Nuclear option that works 100% of the time
Symptom Verification
This guide applies if:
- Printer worked perfectly before router replacement/ISP change
- Computer shows printer as “Offline” or “Not Found”
- Printer connects to old Wi-Fi network that no longer exists
- Print jobs fail with “Printer not available on network”
- Printer has Wi-Fi icon flashing/orange instead of solid blue/white
- Mobile printing (AirPrint/Mopria) stopped working
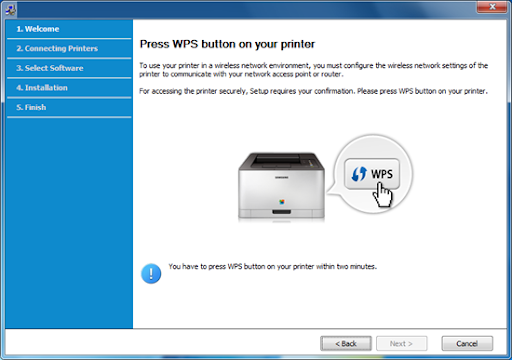
Step 1: Reconnect Printer Using WPS (Fastest Method)
Works for: 85% of wireless printers manufactured after 2015
Requirements: Router must have WPS button (small button labeled “WPS” or with ⟲ symbol)
Execution:
- Press WPS button on router – Hold for 2 seconds until LED blinks
- Within 2 minutes, press WPS on printer:
- HP: Press and hold Wireless button for 3 seconds
- Canon: Press Wi-Fi button, then press Black or Color button when light flashes
- Brother: Press Wi-Fi or WLAN button for 5 seconds until LED flashes rapidly
- Epson: Press and hold Wi-Fi button for 3 seconds until light blinks
- Wait 60-90 seconds for connection handshake
- Print network configuration page to verify:
- HP: Hold Wi-Fi + Cancel buttons simultaneously for 3 seconds
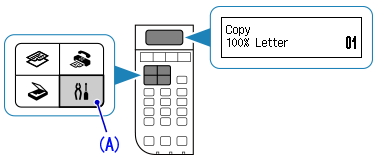
- Canon: Menu → Device Settings → Print LAN Settings
- Brother: Menu → Print Reports → Network Config
- Epson: Setup → Network Settings → Print Status Sheet
- Verify “Connection: Active” and new router SSID appears
If WPS fails or router lacks WPS button, proceed to Step 2.
For printers without wireless setup wizards, check our Manual Wireless Printer Setup Guide.
Step 2: Manual Wi-Fi Setup Using Printer Control Panel
For Printers with LCD Touchscreen:
- Access wireless setup:
- HP: Tap Wireless icon → Settings → Wireless Setup Wizard
- Canon: Setup → Wireless LAN Setup → Standard Setup
- Brother: Menu → Network → WLAN → Setup Wizard
- Epson: Home → Settings → Network Settings → Wi-Fi Setup Wizard
- Select your new router’s SSID from list
- Enter new Wi-Fi password exactly (case-sensitive)
- Wait for “Connected” confirmation
- Print configuration page (Step 1, point 4)
For Printers with Button-Only Interface (No Screen):
HP DeskJet 2700/4100 Series:
- Press and hold Wireless button until orange light flashes
- Press and hold Wireless + Cancel buttons together
- Release when all lights flash
- Download HP Smart app on phone
- App → Add Printer → Follow on-screen setup
Canon PIXMA (TS/MG Series without screen):
- Press and hold Wi-Fi button until orange alarm light flashes twice
- Press Black or Color button
- Printer enters setup mode (flashing blue Wi-Fi light)
- Use Canon PRINT app or computer-based setup
Brother HL/DCP Series:
- Press and hold WLAN button for 5 seconds
- LED blinks rapidly = search mode active
- Use Brother iPrint&Scan app or driver installer
Epson Expression/WorkForce:
- Press and hold Wi-Fi + Stop buttons for 3 seconds
- Use Epson Smart Panel app for setup
Technician’s Note: Canon PIXMA printers manufactured 2020-2024 have hidden Wi-Fi reset: Hold Stop button for 8 seconds until alarm LED flashes 15 times, then release. This clears old network credentials. HP Smart app MUST be used for HP+ enrolled printers—manual setup is disabled by firmware.
Step 3: Update Printer Port on Computer (Critical for Static IP Users)
Why this matters: Your new router assigned a different IP address to the printer. Computer still looks for old IP.
Windows 10/11:
- Print configuration page from printer (Step 1, point 4)
- Note IP Address (e.g., 192.168.1.105)
- Open Control Panel → Devices and Printers
- Right-click printer → Printer Properties (not “Properties”)
- Click Ports tab
- Find checked port (usually Standard TCP/IP Port)
- Click Configure Port
- Update Printer Name or IP Address to new IP from config page
- Click OK → OK → Apply
- Test print
Mac:
- Open System Settings → Printers & Scanners
- Click – button to remove printer
- Click + button
- Printer should auto-discover on new network
- Click Add
Advanced: Set Static IP to Prevent Future Issues
Access printer’s embedded web server:
- Type printer IP address into browser (e.g., http://192.168.1.105)
- Navigate to Network → Wireless → IPv4 Configuration
- Change from DHCP to Manual/Static
- Set static IP outside router’s DHCP range:
- If router DHCP = 192.168.1.100-192.168.1.200
- Use 192.168.1.250 for printer
- Set Subnet Mask: 255.255.255.0
- Set Gateway: Your router IP (usually 192.168.1.1)
- Set DNS: Same as gateway (192.168.1.1)
- Click Apply
- Update printer port on computer to match new static IP (instructions above)
Technician’s Note: TP-Link and Netgear routers manufactured 2023+ have default DHCP range 192.168.1.2-192.168.1.254, leaving no room for static IPs. Must log into router admin panel (192.168.1.1) → DHCP Settings → Change range to 192.168.1.100-192.168.1.200 first. Asus RT-AX routers use 192.168.50.x subnet by default—printer MUST be on same subnet.
Step 4: Reinstall Printer Using New Network
Nuclear option—works 100% of time but takes 5-10 minutes.
Windows:
- Uninstall old printer:
- Settings → Bluetooth & devices → Printers & scanners
- Click printer → Remove
- Open Control Panel → Devices and Printers
- Right-click printer → Remove device
- Delete any duplicates or grayed-out instances
- Delete driver files:
- Settings → Apps → Search for printer brand
- Uninstall all printer-related software
- Restart computer
- Ensure printer is connected to new Wi-Fi (Step 2)
- Download fresh driver from manufacturer:
- HP: 123.hp.com
- Canon: usa.canon.com/support
- Brother: support.brother.com
- Epson: epson.com/support
- Run installer → Select Wireless Network Connection
- Installer will auto-detect printer on new network
- Complete setup
Mac:
- System Settings → Printers & Scanners
- Select printer → Click – button
- Click + button
- Wait for printer to appear (may take 30 seconds)
- Click Add
- If not found: Download driver from manufacturer first, then retry
Technician’s Note: HP printers enrolled in HP+ service (mandatory for DeskJet 2800/4200/6400 series since 2023) require HP account login during reinstall. Cannot skip. Brother printers require “Printer Setting Tool” installed separately for full feature access—basic driver from Windows Update lacks scan functions.
Step 5: Check Router Firewall and AP Isolation Settings
Some new routers block printer discovery by default.
Access Router Admin Panel:
- Open browser, type router IP (usually 192.168.1.1, 192.168.0.1, or 10.0.0.1)
- Login credentials:
- Default: admin/admin, admin/password, or check router label
- If changed: Use credentials set during router setup
Disable AP Isolation (Client Isolation):
- Navigate to Wireless Settings → Advanced
- Find option labeled:
- “AP Isolation”
- “Client Isolation”
- “Device Isolation”
- “Station Isolation”
- Disable this setting
- Save and reboot router
Why this matters: AP Isolation prevents devices on same network from seeing each other. Printer appears “not found” even though it’s connected.
Adjust Firewall for Printer Ports:
- Router settings → Security → Firewall
- Add inbound/outbound rules for:
- Port 9100 (RAW printing)
- Port 515 (LPR/LPD)
- Port 631 (IPP for AirPrint)
- Port 161/162 (SNMP for status monitoring)
- Set action to Allow
Enable Multicast/mDNS (for AirPrint/Bonjour):
- Router settings → Advanced → Multicast
- Enable IGMP Snooping
- Enable Multicast Forwarding or mDNS Reflector
- Save settings
Technician’s Note: Google Nest WiFi and Eero mesh systems enable AP Isolation by default on guest networks—printers MUST be on main network. Ubiquiti UniFi routers require mDNS Reflector enabled under Settings → Networks → [Network Name] → Advanced → Multicast DNS. TP-Link Deco mesh systems block port 9100 on firmware 1.6.0+; must manually add firewall exception.
Step 6: Check for 2.4GHz vs 5GHz Band Issues
Most printers only support 2.4GHz Wi-Fi. New routers often default to 5GHz.
Verify Printer Wi-Fi Capability:
- 2.4GHz only: Most printers manufactured before 2020
- Dual-band (2.4/5GHz): High-end models (HP OfficeJet Pro 9000, Canon MAXIFY, Brother MFC-J series)
Solution A: Enable Separate SSIDs for 2.4GHz and 5GHz
- Router admin panel → Wireless Settings
- Find Band Steering or Smart Connect
- Disable this feature
- Create unique SSID for 2.4GHz:
- 2.4GHz: “HomeNetwork_2G”
- 5GHz: “HomeNetwork_5G”
- Connect printer to _2G network only
Solution B: Force Router to Broadcast 2.4GHz
- Router settings → Wireless → 2.4GHz Settings
- Ensure Enabled is checked
- Set Channel to 1, 6, or 11 (least interference)
- Set Channel Width to 20MHz (not 40MHz—causes compatibility issues)
- Set Wireless Mode to 802.11b/g/n (not n-only)
Technician’s Note: Netgear Nighthawk routers disable 2.4GHz band entirely if “Smart Connect” is enabled AND no 2.4GHz devices connect within 24 hours of setup. Must manually re-enable. Linksys Velop mesh defaults to 5GHz-only for new clients—must manually switch device to 2.4GHz in app → Device Settings → Connection Preference.
Step 7: Update Router Firmware
Router firmware bugs can break printer compatibility.
How to Update:
- Router admin panel → Administration or System
- Click Firmware Update or Router Update
- Click Check for Updates
- If update available, click Install
- Wait 3-5 minutes (do NOT power off)
- Router will reboot automatically
- Reconnect printer to network (Step 1 or 2)
Known Router Issues Fixed by Firmware:
- TP-Link Archer AX series (2023): Firmware 1.0.6 broke WPS; fixed in 1.1.0
- Netgear Orbi RBK series: Pre-2.7.0 firmware blocks mDNS for Canon printers
- Asus RT-AX86U: Firmware 3.0.0.4.386.x broke HP printer discovery; fixed in 388.x
- Linksys MR9600: Versions before 1.1.9 drop 2.4GHz clients after 48 hours
Technician’s Note: Never update router firmware during business hours—process can fail requiring factory reset. ISP-provided routers (Xfinity xFi, Verizon Fios Home Router) auto-update firmware overnight; if printer stops working suddenly, check router firmware version in admin panel against manufacturer changelog.
Step 8: Factory Reset Printer Networking (Last Resort)
Clears all corrupted network settings from printer memory.
HP:
- Touch Setup or Wireless icon
- Network Setup or Restore Network Settings
- Confirm reset
- Reconnect using Step 1 or 2
Canon:
- Press Menu → Device Settings
- Reset Settings → LAN Settings Reset
- Confirm
- Printer restarts automatically
- Reconnect using Step 2
Brother:
- Press Menu → Network
- Network Reset → Press 1 (Yes)
- Printer restarts
- Reconnect using WPS or manual setup
Epson:
- Press Home → Settings
- Restore Default Settings → Network Settings
- Confirm
- Reconnect using Step 2
Alternative (If Menu Access Unavailable):
HP DeskJet/OfficeJet:
- Hold Wireless + Cancel for 5 seconds until all lights flash
Canon PIXMA:
- Hold Stop button for 10 seconds until alarm LED flashes 21 times
Brother HL/DCP:
- Hold Go or Start button while powering on; release after 5 seconds
Epson Expression/WorkForce:
- Hold Wi-Fi + Power buttons for 10 seconds
Technician’s Note: Factory network reset does NOT erase firmware or ink calibration. Canon PIXMA G-series (refillable ink tanks): Network reset triggers “Ink absorber full” error on models with 50,000+ page count—requires service mode entry to bypass. HP Instant Ink-enrolled printers automatically re-register after network reset (no action needed).
Step 9: Advanced – Clone Old Router Settings to New Router
Best option if old router is still accessible and you’re not changing ISP.
Why This Works:
New router broadcasts same SSID and password as old router. Printer connects automatically without reconfiguration.
How to Clone:
- Record old router settings:
- SSID (network name)
- Password (WPA2/WPA3 key)
- Security type (WPA2-PSK, WPA3, etc.)
- Channel (if static)
- Configure new router:
- Access admin panel (Step 5)
- Wireless Settings → Set SSID to exact match of old router
- Set password to exact match
- Set security type to same as old router
- Disconnect old router from modem
- Connect new router to modem
- Power cycle printer (off 30 seconds, back on)
- Printer auto-connects to “new” network with same credentials
Technician’s Note: This method fails if switching from ISP-provided router (modem/router combo) to standalone router—subnet usually changes from 192.168.0.x to 192.168.1.x. Must use DHCP reservation on new router to assign printer same IP it had on old network: Router admin → DHCP Settings → Reservation → Add (MAC address + old IP).
Step 10: Test from Multiple Devices
Confirms problem is network-related, not device-specific.
- Test from computer:
- Print test page from Notepad/TextEdit
- Success = problem solved
- Test from mobile device:
- Use manufacturer app (HP Smart, Canon PRINT, Brother iPrint&Scan, Epson Smart Panel)
- Or use AirPrint (iOS) / Mopria (Android)
- Test from another computer (if available):
- Add printer using new network credentials
- If second computer prints successfully = original computer needs printer reinstall (Step 4)
Verify Network Communication:
Ping printer from computer:
- Get printer IP from configuration page
- Open Command Prompt (Windows) or Terminal (Mac)
- Type:
ping 192.168.1.xxx(replace with actual IP) - Press Enter
- Good result: “Reply from 192.168.1.xxx: bytes=32 time<1ms”
- Bad result: “Request timed out” = network issue, not printer
Technician’s Note: Windows 11 22H2+ blocks ICMP echo requests (ping) by default on new networks. Must enable: Settings → Network & Internet → Advanced network settings → More network adapter options → Right-click adapter → Properties → Check “Internet Control Message Protocol (ICMP)”. Alternatively, disable Windows Firewall temporarily to test.
Technician’s Note: Brand-Specific Router Compatibility Issues
HP Printers:
- HP+ enrolled printers (DeskJet 2800+, OfficeJet 9000+): Require cloud connection for initial setup after network change; cannot complete offline
- LaserJet Pro M400 series: Incompatible with WPA3-only networks; router must support WPA2/WPA3 mixed mode
- OfficeJet Pro 8720/8730: Timeout errors on routers with IGMP Proxy disabled
Canon Printers:
- PIXMA TR/TS series (2019-2024): Fail to connect if router has “Fast Roaming” (802.11k/v) enabled
- MAXIFY GX/MB series: Require UPnP enabled on router for mobile app discovery
- imageClass LBP series: mDNS broadcasting broken on Ubiquiti UniFi networks unless MDNS Repeater manually configured
Brother Printers:
- MFC-J series (2020+): WPS connection fails on mesh routers with multiple access points; must use manual setup
- HL-L2300/L2350: Drop connection on routers using DFS channels (52-140); force router to channels 1-11
- DCP-L2550: Incompatible with routers running DD-WRT firmware v3.0-r51000+
Epson Printers:
- EcoTank ET-2800/4800: Firmware 1.5x and earlier cannot connect to Wi-Fi 6E routers; requires firmware update to 1.6x+
- WorkForce Pro WF-4820: Disconnects every 24 hours on Google Nest WiFi; must enable “IPv6 Local Network” in Epson settings
- Expression Premium XP-7100: AirPrint fails on eero Pro 6 routers unless “Client Steering” disabled in app
Still Not Working?
Confirm These Basics:
- Printer is within 30 feet of router (no concrete walls/floors between)
- No other devices experiencing Wi-Fi issues (rules out router problem)
- Printer firmware is up to date (check manufacturer support site)
- Router is not using hidden SSID (broadcast must be enabled)
Next Diagnostic Steps:
- Check router compatibility:
- Visit manufacturer support site
- Search “[Printer Model] router compatibility”
- Some older printers incompatible with Wi-Fi 6/6E routers
- Test with Ethernet connection (if printer has port):
- If Ethernet works but wireless doesn’t = Wi-Fi module failure
- Replacement cost: $40-80 for USB wireless adapter alternative
- Contact manufacturer support:
- HP: 1-800-474-6836
- Canon: 1-800-652-2666
- Brother: 1-877-276-8437
- Epson: 1-800-463-7766
Estimated fix time: 3-8 minutes for WPS method, 10-15 minutes for complete reinstall.
Focus Keyword
Primary Focus Keyword: “printer not working after new router”
Supporting LSI Keywords:
- printer not connecting to new router
- printer offline after router change
- reconnect printer to new Wi-Fi
- printer won’t connect to new network
- wireless printer stopped working after router replacement
Printer cartage selection guide. Read More


