
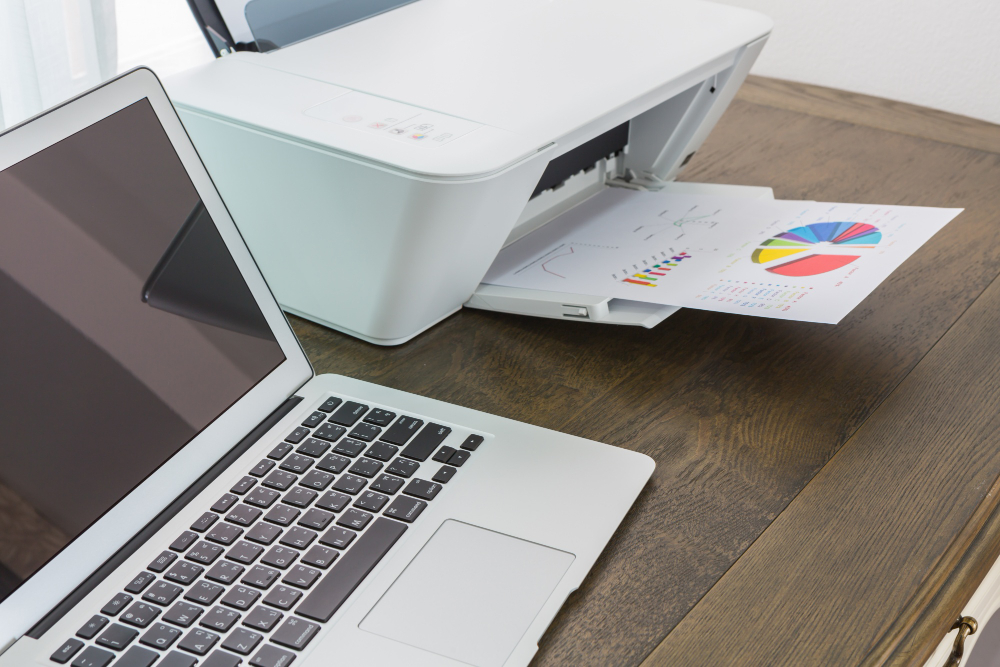
Learning how to print high-quality photos at home has become more accessible than ever, yet many photographers still struggle to achieve professional-looking results from their home printers. With the right equipment, techniques, and knowledge, you can create stunning prints that rival those from professional photo labs while enjoying the convenience and creative control of printing at home.
The global photo printing market continues to thrive despite digital sharing, with millions of people seeking tangible memories they can hold, frame, and display. However, achieving consistently excellent results requires understanding color management, paper selection, printer capabilities, and proper workflow techniques.
Whether you’re a professional photographer looking to offer client prints or an enthusiast wanting to showcase your best work, mastering home photo printing opens up new creative possibilities while providing significant cost savings over commercial printing services for regular use.
What Is Professional Photo Printing?
Professional photo printing involves producing high-quality photographic prints that meet commercial standards for color accuracy, sharpness, longevity, and overall visual impact. This process encompasses everything from image preparation and color management to printer selection and post-processing techniques.
Unlike casual snapshot printing, professional photo printing requires careful attention to technical specifications including resolution, color profiles, paper characteristics, and printer settings. The goal is to reproduce images as closely as possible to the photographer’s original vision while ensuring prints will maintain their quality over time.
Key elements include using appropriate file formats (typically TIFF or high-quality JPEG), maintaining proper color workflows, selecting suitable papers for different image types, and calibrating equipment for consistent results. Professional-quality home printing has become increasingly achievable as printer technology has advanced and high-quality papers have become more accessible to consumers.
The distinction between casual and professional printing lies not just in equipment quality, but in the systematic approach to color management, file preparation, and understanding how different variables affect the final output quality.
7 Essential Steps to Print High-Quality Photos at Home
1. Choose the Right Printer for Photo Printing
Selecting an appropriate printer is the foundation of achieving professional results when you print high-quality photos at home. Inkjet printers specifically designed for photo printing offer superior color reproduction compared to general-purpose printers.
Look for printers with at least 6-8 ink cartridges, including dedicated photo colors like light cyan and light magenta. Canon’s PIXMA Pro series, Epson’s SureColor line, and HP’s DesignJet models are popular choices among serious photographers.
Consider maximum print size requirements – while 13×19-inch printers offer versatility, smaller desktop models like 8.5×11-inch printers can still produce excellent results for most home users at a lower cost.
2. Master Color Management and Calibration
Color management ensures your prints match what you see on your monitor. Start by calibrating your monitor using hardware calibration tools like X-Rite ColorMunki or Datacolor SpyderX for accurate color representation.
Install and use proper ICC color profiles for your specific printer and paper combinations. Most paper manufacturers provide free ICC profiles on their websites that you can download and install in your operating system.
Set up a consistent lighting environment for viewing prints. Use daylight-balanced LED lights (5000K-6500K) to evaluate print quality, as standard indoor lighting can make color assessment difficult and unreliable.

3. Prepare Images with Proper Resolution and Sharpening
Ensure your images have sufficient resolution for your intended print size. A general rule is 300 pixels per inch (PPI) for optimal quality, though 240 PPI can work for larger prints viewed from normal distances.
Apply appropriate sharpening for print output, which differs from screen sharpening. Use output sharpening in Adobe Lightroom or Photoshop’s “Sharpen for Print” feature to compensate for the softening that occurs during the printing process.
Convert images to the appropriate color space – Adobe RGB or ProPhoto RGB for editing, then convert to your printer’s color space during the printing process for optimal color reproduction.
4. Select Premium Photo Papers
Paper choice dramatically affects print quality, longevity, and overall appearance. Different paper types suit different image styles – glossy papers enhance color saturation and sharpness, while matte papers offer a more artistic, gallery-like appearance.
Popular premium paper brands include Hahnemühle, Canson, Red River Paper, and Epson’s own paper lines. Each offers different textures, weights, and surface characteristics that can enhance specific types of photographs.
Consider paper longevity ratings if archival quality is important. Look for papers rated for 100+ years when displayed properly, and always use genuine manufacturer inks for maximum longevity.
5. Optimize Printer Settings and Driver Configuration
Access your printer’s advanced settings through the manufacturer’s printing software rather than using generic system drivers. This provides access to color management options, paper-specific settings, and quality controls.
Disable automatic color correction in your printer driver when using color-managed workflows. Let your photo editing software handle color management for more predictable and accurate results.
Experiment with different quality settings – the highest quality isn’t always necessary and can waste ink. Many printers produce excellent results on “High” quality settings that use less ink and print faster than maximum quality modes.

6. Establish Proper Print Workflow
Develop a consistent workflow from image editing to final print. This includes consistent monitor calibration, using the same color spaces throughout your process, and maintaining standardized lighting conditions for print evaluation.
Always print test strips or small versions before committing to large, expensive prints. This allows you to fine-tune color and exposure adjustments without wasting materials on full-size prints.
Keep detailed notes about successful print settings, including paper types, printer settings, and any image adjustments made. This documentation helps you replicate successful results consistently.
7. Handle and Store Prints Properly
Allow prints to dry completely before handling – inkjet prints can take 24 hours to fully cure and reach their final color appearance. Handle prints with clean, dry hands or cotton gloves to avoid fingerprints and oils.
Store prints in archival-quality storage materials away from direct sunlight, heat, and humidity. Acid-free boxes, interleaving tissue, and proper environmental conditions help ensure your prints maintain their quality for decades.
Consider framing with UV-protective glass for displayed prints, and maintain stable temperature and humidity levels in display areas to maximize print longevity and appearance.
Additional Insights and Tools for Professional Results
Beyond basic printing techniques, several advanced tools can elevate your home photo printing results. Soft-proofing in Adobe Lightroom or Photoshop allows you to preview how your images will look when printed on specific paper types, helping you make necessary adjustments before printing.
Print evaluation tools like viewing booths or standardized lighting setups help you assess print quality consistently. Simple solutions include daylight-balanced desk lamps or more sophisticated color-matching light boxes for critical evaluation work.
Consider investing in a densitometer or colorimeter for measuring print density and color accuracy if you’re doing high-volume or critical color work. These tools help maintain consistency across multiple prints and different printing sessions.
Many photographers find success using RIP (Raster Image Processor) software like ImagePrint or Qimage for enhanced control over the printing process, though these tools require more technical knowledge than standard printer drivers.
Troubleshooting Common Photo Printing Mistakes
One of the most frequent issues when attempting to print high-quality photos at home is color mismatch between screen and print. This usually stems from improper monitor calibration or incorrect color management settings. Ensure your monitor is properly calibrated and you’re using appropriate ICC profiles for your paper and printer combination.
Banding or streaking in prints often indicates dirty print heads or low ink levels. Run printer head cleaning cycles as needed, but avoid excessive cleaning as this wastes ink. If problems persist, consider manually cleaning print heads or replacing cartridges.
Grain or noise that appears more prominent in prints than on screen typically results from insufficient image resolution or over-sharpening. Ensure your images have adequate resolution for your print size and apply output sharpening appropriately rather than using aggressive screen sharpening settings.
Color shifts or unexpected color casts can result from using incorrect paper settings in your printer driver. Always match your driver paper settings to the actual paper you’re using, and ensure you’re using the correct ICC profile for that specific paper type.
Paper feeding issues or print alignment problems often stem from incorrect paper loading or worn feed mechanisms. Ensure paper is loaded straight and properly adjusted in the paper tray, and clean feed rollers regularly to maintain proper paper handling.
Frequently Asked Questions
Q: What resolution do I need to print high-quality photos at home? A: For optimal quality, use 300 PPI (pixels per inch) at your final print size. For example, an 8×10 print should be 2400×3000 pixels. 240 PPI can work for larger prints viewed from normal distances.
Q: How important is paper quality for home photo printing? A: Paper quality is crucial for professional results. Premium photo papers provide better color reproduction, sharper detail, and longer archival life compared to generic papers. The investment in quality paper is worth the improved results.
Q: Can I achieve professional results with an entry-level photo printer? A: Yes, many entry-level dedicated photo printers can produce excellent results when properly calibrated and used with quality papers. The key is understanding color management and proper printing techniques rather than just expensive equipment.
Q: How long do home-printed photos last compared to lab prints? A: When using quality inks and papers, home prints can last 100+ years under proper display conditions, often matching or exceeding commercial lab print longevity. Proper storage and display conditions are crucial for maximum lifespan.
Conclusion
Mastering how to print high-quality photos at home requires combining the right equipment with proper techniques and consistent workflows. While the initial learning curve may seem challenging, the rewards of producing professional-quality prints in your own space are substantial, offering both creative satisfaction and long-term cost savings.
The key to success lies in understanding that great home printing is a system involving calibrated monitors, quality printers, premium papers, and proper color management working together harmoniously. Each component plays a crucial role in achieving consistently excellent results.
Start with the fundamentals of color management and printer calibration, then gradually expand your knowledge and equipment as your skills develop. With patience and practice, you’ll soon be producing prints that rival professional labs while enjoying complete creative control over your photographic output. The investment in time and equipment pays dividends in the quality and satisfaction of your final printed photographs.
Speed Up Your Printer: 8 Simple Hacks for Lightning-Fast Printing Read More.


Recent Comments