
Introduction
Leaking ink cartridge problems can quickly turn a simple printing task into a frustrating, messy disaster. When ink seeps out where it shouldn’t, it can stain your hands, damage your printer’s internal components, waste expensive ink, and compromise print quality. This issue affects users of all major printer brands including HP, Canon, Epson, and Brother, regardless of whether you use original or third-party cartridges. In this comprehensive guide, we’ll explore the common causes behind ink cartridge leakage and provide eight practical solutions to fix the problem and prevent future leaks, saving you time, money, and the headache of dealing with stubborn ink stains.
What Is Ink Cartridge Leakage?
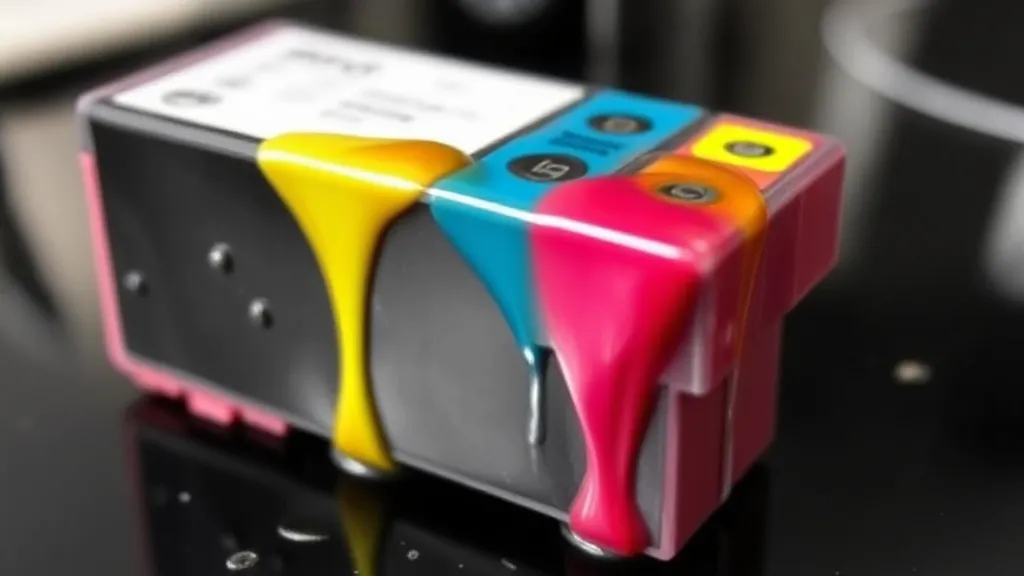
Ink cartridge leakage occurs when printer ink escapes from its sealed containment system within the cartridge and flows into areas where it shouldn’t be present. Modern ink cartridges are sophisticated components designed with precise internal chambers, membranes, and seals that maintain proper ink flow during printing while preventing unwanted leakage when idle or in storage.
Inside a typical cartridge, ink is stored in sponge-filled reservoirs or direct ink chambers that release controlled amounts through tiny nozzles during printing operations. A properly functioning cartridge maintains balanced internal pressure that prevents both air from entering (which causes drying) and ink from flowing out uncontrolled. This delicate pressure balance can be disrupted by various factors including temperature changes, physical damage, improper handling, or manufacturing defects.
When leakage occurs, ink may appear around the printhead nozzles, on the copper contacts, along the cartridge seams, or even inside the cartridge packaging before installation. This not only wastes expensive ink but can also cause significant problems—from poor print quality and clogged printheads to permanent damage to your printer’s internal components if the issue isn’t addressed promptly.
Understanding the specific mechanics of how and why ink cartridges leak is essential for implementing the most effective solution for your particular situation.
8 Ways to Fix a Leaking Ink Cartridge
When dealing with ink cartridge leakage, follow these eight proven solutions to resolve the issue and get back to trouble-free printing.
1. Properly Handle and Install Cartridges
Incorrect handling is a leading cause of leakage that can be easily prevented:
- Keep protective tape in place until ready to install. This tape covers the ink outlets and prevents premature leakage.
- Avoid touching the copper contacts or nozzle plate with your fingers. Natural oils from skin can interfere with proper sealing.
- Hold cartridges by their sides rather than top or bottom during installation.
- Insert cartridges gently but firmly until they click into place—forcing them can damage internal seals.
- Follow manufacturer alignment directions precisely, as some cartridges must be inserted at specific angles.
- Run printer alignment procedures immediately after installation to properly seat the cartridge.
Proper installation establishes the correct positioning and pressure needed for leak-free operation. Many leakage issues happen simply because the cartridge wasn’t installed correctly from the start.
2. Clean Leaking Cartridges Safely
When you notice leakage, proper cleaning can often resolve the issue:
- Power off your printer and unplug it for safety.
- Remove the leaking cartridge carefully, avoiding contact with the leaking ink.
- Gently blot (don’t wipe) excess ink from the exterior using lint-free cloth or cotton swabs.
- Inspect the printhead surface for ink buildup or debris that may be preventing a proper seal.
- Clean printhead contacts using a dry, lint-free cloth first, then lightly dampened with distilled water if necessary.
- Allow the cartridge to sit upright on a protected surface for 30 minutes to stabilize internal pressure.
- Reinstall following proper installation procedures as outlined in the previous section.
This cleaning process removes ink that may be interfering with proper seating and sealing while allowing internal pressure to normalize.
3. Check for and Clear Clogs
Clogged nozzles can create back pressure that forces ink to find alternate escape routes:
- Run your printer’s built-in cleaning cycle through the maintenance or tools menu.
- Perform a nozzle check pattern to identify any clogged color channels.
- For persistent clogs, remove the cartridge and gently blot (don’t wipe) the printhead with a damp, lint-free cloth.
- For severe clogs, consider using your printer manufacturer’s recommended printhead cleaning solution.
- Never use alcohol or harsh solvents on printheads unless specifically recommended by the manufacturer.
- Allow the cartridge to sit upright for at least an hour after cleaning to stabilize.
- Run additional cleaning cycles after reinstallation if needed.
Resolving clogs helps restore proper pressure balance within the cartridge system, often eliminating the root cause of leakage.
4. Store Unused Cartridges Properly
Improper storage is a common cause of leakage that can be easily prevented:
- Keep cartridges in their original sealed packaging until ready for use.
- Store unused cartridges upright (not on their sides or upside down) in a cool, dark place.
- Maintain consistent temperature between 60-75°F (15-24°C)—avoid freezing or high heat.
- Avoid exposure to direct sunlight or sources of heat which can expand ink and cause leaks.
- If removing a cartridge temporarily, place it in an airtight container or sealable plastic bag.
- For long-term storage, consider specialized cartridge storage containers that prevent drying.
Proper storage maintains the integrity of the cartridge seals and internal pressure, significantly reducing the likelihood of leaks when the cartridge is eventually installed.
5. Address Pressure and Temperature Issues
Environmental factors can significantly impact cartridge performance:
- Allow cold cartridges to warm to room temperature before installation (at least 2 hours).
- Avoid using printers in environments with rapidly changing temperatures or high humidity.
- Keep printers away from windows, heaters, or air conditioners that create temperature fluctuations.
- For high-altitude locations (above 7,000 feet/2,100 meters), check if your printer requires special high-altitude mode settings.
- During air travel, transport cartridges in sealed containers to prevent pressure-related leaks.
- If moving a printer with installed cartridges, secure the print carriage according to manufacturer instructions.
Temperature and pressure stabilization helps maintain the delicate balance needed for proper ink containment within the cartridge.
6. Examine Cartridge for Physical Damage
Sometimes physical damage is the root cause of leakage:
- Carefully inspect the cartridge exterior for cracks, breaks, or deformations.
- Check the bottom printhead area for signs of damage or improper seating.
- Examine cartridge seams where plastic components are joined together.
- Look for punctures in the top vent area that could be disrupting pressure regulation.
- Verify that protective tape was removed properly without causing damage to nozzles.
- If damage is found, the cartridge will likely need replacement as physical damage generally cannot be repaired.
Physical inspection often reveals problems that aren’t immediately obvious but are causing persistent leaks.
7. Use Manufacturer Recommended Products
Using the wrong cartridges or attempting to refill cartridges can lead to leakage:
- Consider using genuine manufacturer cartridges which are specifically designed for your printer model.
- If using third-party cartridges, choose reputable brands with good quality control standards.
- For remanufactured cartridges, check reviews and verify the remanufacturer’s quality testing procedures.
- Be cautious with refill kits which can disrupt internal pressure balances if not used correctly.
- Never mix different brands or types of ink within the same printer as chemical incompatibilities can damage seals.
- Avoid expired cartridges as their seals may have degraded over time.
While third-party options can be cost-effective, their variable quality control may contribute to leakage problems in some cases.
8. Maintain Your Printer Regularly
Overall printer maintenance helps prevent conditions that contribute to cartridge leakage:
- Follow manufacturer-recommended maintenance schedules for cleaning and servicing.
- Keep the interior of your printer clean from dust and paper debris that can affect cartridge seating.
- Use your printer regularly to prevent ink from drying and causing pressure issues.
- Update printer firmware as manufacturers often address ink flow issues in updates.
- Check the cartridge carriage for obstructions or buildup that might prevent proper cartridge seating.
- Clean printer rails and cartridge movement paths to ensure smooth, accurate positioning.
Proper printer maintenance creates an optimal environment for cartridges to function as designed, reducing the risk of leaks developing.

Additional Tools and Products for Preventing Ink Leaks
Beyond the standard troubleshooting methods, several specialized tools and products can help address persistent ink leakage problems:
Professional Cleaning Kits
Manufacturer-approved printhead and cartridge cleaning kits provide specialized solutions:
- Printhead cleaning solutions formulated specifically for breaking down dried ink without damaging sensitive components
- Specialized cleaning tools like foam swabs that won’t leave lint or residue on delicate printhead surfaces
- Syringe applicators for precise application of cleaning solutions only where needed
- Ultrasonic cleaning devices (for certain printer models) that use sound waves to dislodge dried ink
These professional-grade products are designed to address serious clogging issues that may be causing pressure buildup and resultant leakage.
Cartridge Storage Solutions
Specialized storage products help maintain cartridge integrity between uses:
- Airtight cartridge storage containers with humidity control to prevent drying
- Printhead capping stations for temporary storage that prevents ink from drying in nozzles
- Protective caps designed to replace the original cartridge packaging when storing partially used cartridges
- Vacuum-sealed storage bags that maintain consistent pressure environments
Proper storage solutions are particularly valuable for photographers, designers, and others who regularly switch between different ink types or colors.
Ink Flow Regulators
For advanced users who refill their own cartridges, specialized equipment can help maintain proper pressure:
- Pressure equalizing tools designed to release excess pressure before it causes leaks
- Specialized refill stations that control the rate and pressure of ink insertion
- Cartridge reset devices that properly prepare refilled cartridges for reuse
While primarily for advanced users, these tools can significantly reduce the leak problems often associated with refilled cartridges.
Common Mistakes When Dealing With Leaking Ink Cartridges
Avoid these frequent errors that can exacerbate ink leakage issues:
Using Improper Cleaning Methods
Inappropriate cleaning approaches can make leakage worse:
- Wiping instead of blotting can force ink deeper into crevices or damage nozzles
- Using rubbing alcohol or household cleaners can degrade rubber seals and plastic components
- Excessive moisture during cleaning can enter cartridge ventilation systems and disrupt internal pressure
- Scrubbing printhead nozzles can permanently damage these micron-sized openings
- Using paper towels or tissues that leave lint behind, potentially causing clogs and further leaks
Always use lint-free cloths, microfiber materials, or foam swabs specifically designed for printer maintenance, and blot gently rather than wiping aggressively.
Ignoring Warning Signs
Early indicators of potential leakage are often overlooked:
- Streaky or faded prints can indicate beginning nozzle issues that may progress to leaks
- Cartridges that are difficult to install might have alignment problems that can cause pressure issues
- Ink droplets inside cartridge packaging suggest the cartridge may already have seal problems
- Error messages about cartridge problems often precede physical leaking
- Unusual printing noises might indicate carriage movement issues that can lead to improper cartridge seating
Being proactive at the first sign of these issues can prevent messy leakage situations from developing.
Mixing Incompatible Products
Not all printer products work well together:
- Combining different brands of ink in the same system can cause chemical reactions that degrade seals
- Using paper not designed for your ink type can cause excessive ink absorption and pooling around nozzles
- Installing partial sets of new cartridges alongside old ones can create pressure imbalances in shared systems
- Mixing refilled and new cartridges often creates inconsistent pressure dynamics
- Using non-compatible cartridge models even from the same manufacturer can cause fitting issues and leaks
Stick with compatible components recommended for your specific printer model to minimize leakage risks.
Improper Printer Placement
Where and how you position your printer matters:
- Placing printers in direct sunlight can heat cartridges unevenly, causing pressure changes
- Unstable or vibrating surfaces can gradually unseat cartridges from their proper position
- Tilted or uneven placement affects how ink settles within cartridges, potentially causing leaks
- Locations with significant temperature fluctuations like near doorways or windows can trigger repeated expansion/contraction cycles
- Dusty environments contribute to printhead clogs that create back pressure and leaks
Stable, moderate-temperature, clean locations significantly reduce the risk of developing cartridge leaks.
Frequently Asked Questions
Is it safe to continue using a printer if I notice ink leaking?
It’s not recommended to continue using a printer with leaking cartridges. Ink can damage sensitive electronic components inside your printer, potentially leading to costly repairs or complete printer failure. Additionally, leaking ink can spread to the paper path, resulting in smeared documents and potentially permanent stains on your printer’s rollers and other components. The best approach is to power off the printer immediately, unplug it, and resolve the leakage issue before resuming printing.
Why do my cartridges leak only after refilling them?
Refilled cartridges leak more frequently because the refilling process can disrupt the delicate pressure balance inside the cartridge. Commercial cartridges are precision-filled in controlled factory environments. Home refilling often introduces air bubbles, overfilling, or damage to pressure-regulating components. Additionally, the seals on cartridges are typically designed for single use and may be compromised during the refilling process. If you choose to refill, use quality refill kits, follow instructions precisely, and consider specialized pressure-equalizing tools designed for home refilling.
Does using third-party ink increase the chance of leakage?
While many third-party inks work perfectly fine, they do statistically have higher leakage rates than original manufacturer cartridges. This isn’t necessarily due to ink quality, but rather variations in cartridge construction, pressure regulation systems, and quality control standards. Original manufacturer cartridges are designed specifically for their printers with precisely calibrated pressure systems and thoroughly tested seals. If you prefer third-party options for cost savings, research reputable brands with good reviews specifically mentioning leak resistance, and consider higher-rated “premium” third-party cartridges rather than the lowest-cost options.
How can I remove ink stains from my hands and printer components?
For hands, try hand sanitizer (the alcohol helps dissolve ink), dish soap with baking soda as a gentle abrasive, or commercial hand degreasers like Fast Orange. For printer components, only clean non-electronic parts using isopropyl alcohol wipes (90% or higher) or specialized printer cleaning solutions. Never use alcohol on rubber components or seals as it can cause degradation. For stubborn stains on plastic printer parts, a small amount of non-gel toothpaste on a cotton swab can work as a gentle abrasive. Always test cleaning solutions on an inconspicuous area first, and never apply liquids directly to electronic components.
Conclusion
A leaking ink cartridge is more than just a messy inconvenience—it’s a sign that something in your printing system needs attention. By understanding the common causes of leakage and implementing the appropriate fix from our eight solutions, you can resolve most ink leakage issues without requiring professional support. Remember that prevention is the best approach: proper cartridge handling, storage, and regular printer maintenance will significantly reduce your chances of experiencing leaks in the future.
For persistent leakage problems that don’t respond to these solutions, contact your printer manufacturer’s support team, as they may be aware of specific issues affecting your printer model or particular cartridge batches. Most importantly, address leaks promptly when they occur to prevent the potentially costly damage that can result from ink reaching sensitive electronic components. With the right approach to cartridge management, you can enjoy reliable, leak-free printing and avoid the frustration of ink-stained hands and ruined documents.
How to Print Documents from Google Drive Without Downloading Read More.


Recent Comments