
Introduction
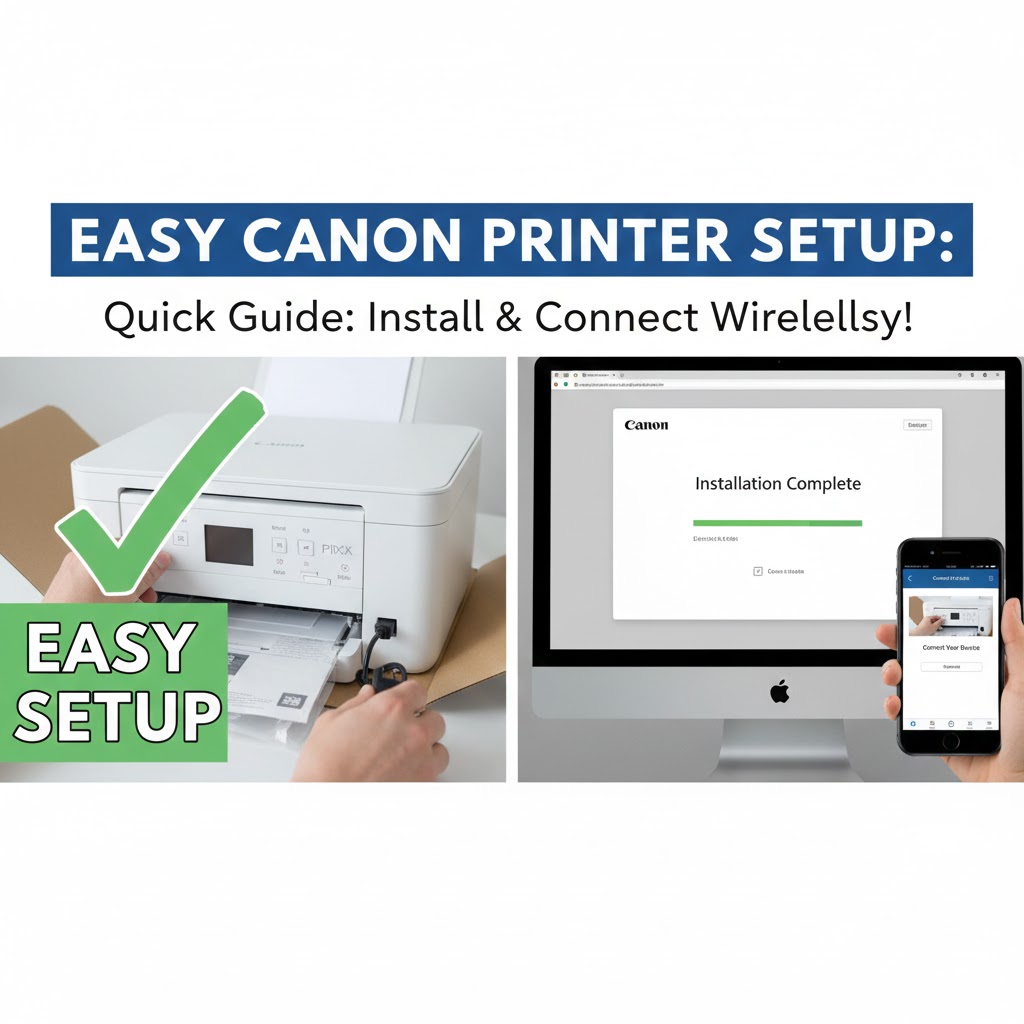
Setting up a new canon printer setup doesn’t have to be complicated. Whether you’ve just unboxed a brand-new Canon PIXMA, MAXIFY, or imageCLASS printer, getting it ready to print is easier than you think. Many people feel overwhelmed when they see cables, software CDs, and instruction manuals. But the truth is simple: with the right steps, you can have your printer running in less than 30 minutes.
This guide walks you through everything you need for a successful canon printer setup. You’ll learn how to unpack your device, install drivers, connect to Wi-Fi, and troubleshoot common problems. We’ve made each step clear and simple so anyone can follow along. Let’s get your Canon printer up and running today.
What Is Canon Printer Setup?
Canon printer setup refers to the complete process of preparing your Canon printer for use. This includes unpacking the device, removing protective materials, installing ink cartridges, loading paper, and connecting the printer to your computer or network.
The setup process also involves installing printer drivers and software on your computer. These drivers act as a bridge between your device and the printer. Without them, your computer can’t communicate with the printer properly.
Modern Canon printers offer multiple connection options. You can connect via USB cable for a direct connection, or use Wi-Fi for wireless printing from multiple devices. Some models also support Bluetooth and cloud printing services.
A proper canon printer setup ensures your device works smoothly from day one. It prevents printing errors, poor print quality, and connectivity issues. Taking 20-30 minutes to set up correctly saves hours of frustration later.
7 Simple Steps for Canon Printer Setup
Step 1: Unbox and Prepare Your Printer
Start by carefully removing your Canon printer from the box. Remove all packaging materials, tape, and protective foam. Check inside the printer for any orange or blue protective pieces. These must be removed before you turn on the device.
Place your printer on a flat, stable surface near your computer. Make sure there’s enough space around it for paper trays and ventilation. Don’t put it in direct sunlight or near heat sources.
Plug the power cable into the printer and then into a wall outlet. Press the power button to turn it on. The printer will make some initial sounds as it prepares itself.
Step 2: Install Ink Cartridges
Open the ink cartridge cover. Your printer will move the cartridge holder to the loading position. Remove the new ink cartridges from their packaging. Don’t touch the copper contacts or ink nozzles.
Insert each cartridge into its color-coded slot. Push firmly until you hear a click. Close the cover and wait for the printer to initialize the cartridges. This takes about 2-5 minutes.
Some Canon models require you to align the print heads after installing cartridges. The printer may print an alignment page automatically. If it does, place this page on the scanner glass and follow the on-screen instructions.
Step 3: Load Paper
Pull out the paper tray from the front or rear of the printer. Adjust the paper guides to match your paper size. Most people use standard letter or A4 size paper.
Fan a stack of paper to prevent sheets from sticking together. Place the paper in the tray with the print side facing down (for rear trays) or up (for front trays). Don’t overfill the tray.
Slide the paper guides snugly against the paper edges. Push the tray back into the printer. Your printer is now ready to print test pages.
Step 4: Download Canon Printer Drivers
Visit the official Canon support website at https://www.usa.canon.com/support. Enter your printer model number in the search box. Download the latest drivers for your operating system (Windows or Mac).
You can also use the CD that came with your printer. However, downloading from the website ensures you get the most updated software. Updates often include bug fixes and new features.
For Windows users, the download will be an .exe file. For Mac users, it will be a .dmg file. Save this file to your Downloads folder.
Step 5: Install Printer Software

Double-click the downloaded file to start the installation. Follow the on-screen prompts. The installer will guide you through the canon printer setup process.
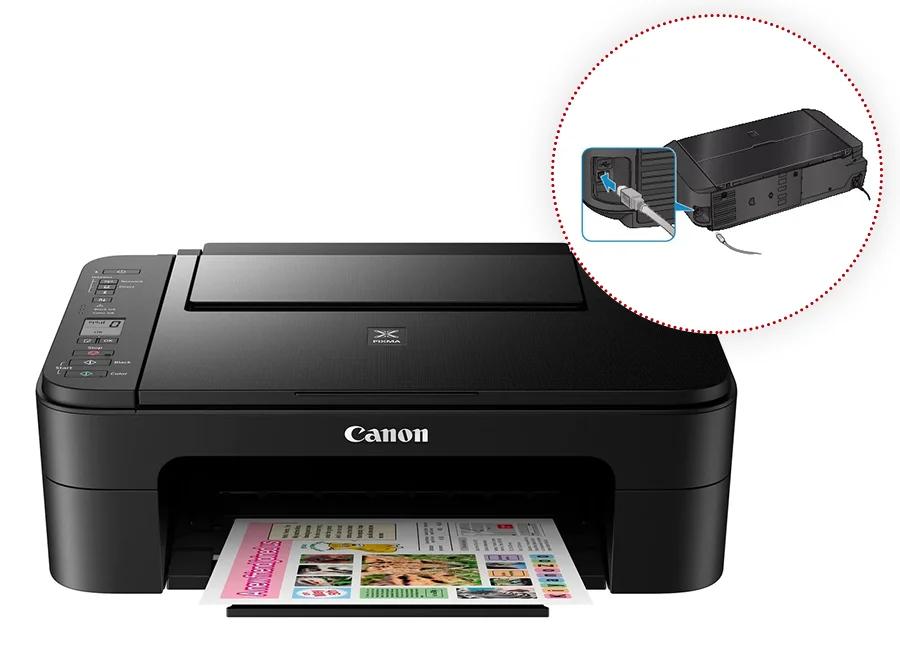
Choose your connection type when prompted: USB or Wireless. If using USB, connect the cable only when the installer tells you to. Connecting too early can cause problems.
The software will install printer drivers, scanning utilities, and Canon’s printer management tools. This process takes 5-10 minutes. Don’t turn off your computer or printer during installation.
Step 6: Connect to Wi-Fi (Wireless Setup)
For wireless canon printer setup, press the Wi-Fi button on your printer. The Wi-Fi light will start flashing. On your printer’s display screen, navigate to the wireless setup menu.
Select “Wireless LAN Setup” and then choose “Easy Setup” or “WPS Setup.” If your router has a WPS button, press it within 2 minutes of selecting WPS setup on your printer. The devices will connect automatically.
For manual setup, select your Wi-Fi network name from the list on the printer screen. Enter your Wi-Fi password using the printer’s keypad. The Wi-Fi light will stop flashing when connected successfully.
Step 7: Print a Test Page
Open any document on your computer. Click File > Print. Select your Canon printer from the printer list. Click Print to send a test page.
If the page prints correctly, your canon printer setup is complete! If nothing happens, check that the printer is powered on and properly connected.
You can also print a test page directly from the printer. Go to the printer’s menu, select Setup or Settings, and choose “Print Test Page” or “Print Configuration Page.”
Additional Tools and Resources for Canon Printer Setup

Canon offers several helpful tools to make your setup easier. The Canon PRINT Inkjet/SELPHY app is available for iOS and Android devices. This app lets you print and scan from your smartphone. It also guides you through wireless setup with step-by-step instructions.
The Canon Quick Menu software gets installed with your printer drivers. It provides quick access to scanning, printing, and printer settings. You can launch it from your system tray or applications folder.
Canon’s IJ Printer Assistant Tool helps you maintain your printer. It lets you clean print heads, check ink levels, and adjust print quality settings. This tool is especially useful for preventing common printing problems.
For network printing in offices, Canon’s Network Tool helps configure IP addresses and network settings. System administrators can use this to manage multiple Canon printers on the same network.
Troubleshooting Common Canon Printer Setup Issues
Printer Not Detected
If your computer doesn’t recognize your Canon printer during setup, first check all cable connections. For USB connections, try a different USB port or cable. Some USB 3.0 ports can cause detection issues with older printers.
For wireless setup problems, ensure your printer and computer are on the same Wi-Fi network. Restart your router, printer, and computer. Then try the wireless setup process again from the beginning.
Check if your firewall or antivirus software is blocking the printer connection. Temporarily disable these programs during installation. Remember to turn them back on afterward.
Print Quality Problems
If your first prints look faded or have lines, run the print head cleaning function. Access this through your printer’s menu or the printer software on your computer. You may need to run it 2-3 times for best results.
Make sure you’re using the correct paper type in your print settings. Using “Plain Paper” settings with photo paper will produce poor results. Match your settings to your actual paper type.
Check that you removed all protective tape from the ink cartridges during installation. Even a small piece of tape can block ink flow and cause printing problems.
Wi-Fi Connection Drops
If your wireless canon printer setup keeps disconnecting, move the printer closer to your router. Walls, metal objects, and other electronics can interfere with Wi-Fi signals.
Check if your router is using the 2.4GHz or 5GHz band. Most Canon printers only support 2.4GHz networks. If your router broadcasts both, make sure you’re connecting to the 2.4GHz network.
Update your printer’s firmware through the Canon website. Firmware updates often fix connectivity bugs and improve wireless stability.
Error Messages During Installation
“Error 5B00” or “Error 1403” messages usually indicate a problem with the print head or waste ink absorber. Contact Canon support for these errors, as they may require professional service.
If you see “Cannot connect to printer” errors, uninstall the printer software completely. Restart your computer and then reinstall from a fresh download. Old driver files sometimes conflict with new installations.
For Mac users, remove the printer from System Preferences > Printers & Scanners before reinstalling. Then add it back after the new driver installation completes.
Frequently Asked Questions (FAQs)
Q1: Do I need the CD to set up my Canon printer?
No, you don’t need the CD. You can download the latest drivers from Canon’s website. This is actually better because website drivers are more updated than CD versions.
Q2: Can I use my Canon printer without installing software?
For basic printing, some operating systems have built-in drivers. However, installing Canon’s official software gives you access to all features like scanning, print quality adjustments, and ink level monitoring.
Q3: How do I set up canon printer on multiple computers?
Install the printer software on each computer separately. For wireless printers, each computer connects to the same printer over Wi-Fi. For USB printers, you can use a USB switch or share the printer through network settings.
Q4: Why isn’t my canon printer setup connecting to Wi-Fi?
Check that you’re entering the correct Wi-Fi password. Make sure your router uses 2.4GHz (not 5GHz only). Restart both your router and printer. Try the WPS setup method if your router supports it.
Q5: How long does canon printer setup take?
A complete canon printer setup typically takes 20-30 minutes. This includes unboxing, installing cartridges, connecting to Wi-Fi, and installing software. USB setups are slightly faster than wireless setups.
Conclusion

Completing your canon printer setup is straightforward when you follow the right steps. Start by unpacking carefully and installing ink cartridges properly. Load paper, download the latest drivers from Canon’s website, and choose your connection type. Whether you go wireless or USB, the installation wizard guides you through each step.
Remember to print a test page to confirm everything works correctly. If you encounter problems, check your connections, restart your devices, and ensure you’re using the latest software. Most setup issues have simple solutions.
With your Canon printer now ready, you can print documents, photos, and more. Regular maintenance like cleaning print heads and using genuine Canon ink will keep your printer running smoothly for years. Happy printing!
Canon MegaTank Printer: Ultimate Guide to Smart, Cost-Saving Printing 2025 Read More.


