
Introduction
Cleaning printer inside components might seem unnecessary, but it’s one of the most important maintenance tasks you can do. Dust, paper particles, and ink residue build up inside your printer over time, causing paper jams, poor print quality, and even complete breakdowns.
Most people only clean the outside of their printer, leaving the interior to collect debris for years. This hidden dirt affects every print job you run. The good news? Internal cleaning is easier than you think and takes just 15-20 minutes.
This guide shows you exactly why internal printer cleaning matters and how to do it safely. You’ll learn what tools you need, which areas to focus on, and how often to clean for best results.
Let’s explore how a clean printer saves you money and frustration.
What Is Printer Internal Cleaning?
Printer internal cleaning means removing dust, paper fibers, and ink buildup from inside your printer’s housing. Unlike wiping the exterior, this process targets critical components where debris actually causes problems.
The inside of your printer contains several vulnerable areas. Paper rollers collect dust and lose their grip. Sensors get covered in particles and misread paper position. Print heads accumulate dried ink that clogs nozzles. The paper path traps tiny fibers that eventually cause jams.
Every time you print, paper friction creates microscopic particles. These particles float inside the printer and settle on mechanical parts. Dust from your room also enters through ventilation openings. Over months, this buildup becomes thick enough to interfere with printer operation.
Regular internal cleaning prevents these issues before they start. Professional print shops clean their equipment weekly. Home users should clean every 3-6 months depending on usage.
The process is simple and doesn’t require technical skills. You just need the right tools and a gentle approach. Most printer manuals include basic cleaning instructions, though many people never read that section.
Understanding what happens inside your printer helps you maintain it properly.
8 Essential Steps for Cleaning Printer Inside Components
Step 1: Power Down and Unplug Safely
Before cleaning printer inside areas, always turn off your printer completely. Press the power button and wait for all sounds to stop. Lights should be completely dark.
Unplug the power cable from both the printer and wall outlet. This prevents electrical shock and protects internal electronics. Never skip this step even for quick cleaning.
Remove any connected USB or network cables. These can get in the way during cleaning. Place them somewhere you’ll remember for easy reconnection.
Wait 5 minutes after unplugging before opening the printer. This allows internal components to cool down. Hot print heads or fusers can burn your fingers.
Work in a well-lit area with plenty of space. You’ll need room to access all printer panels and set aside removed parts.
Step 2: Gather Your Cleaning Tools
Proper tools make cleaning printer inside components safe and effective. Never use harsh chemicals or abrasive materials that damage delicate parts.
You’ll need lint-free cloths or microfiber towels. Regular paper towels leave fibers behind. Cotton swabs help reach tight corners and small components.
Get isopropyl alcohol (70% or higher concentration). This evaporates quickly without leaving residue. Distilled water works for basic cleaning but takes longer to dry.
A soft-bristled brush or clean paintbrush removes loose dust. Compressed air cans blow debris from hard-to-reach areas. Hold cans upright to avoid liquid spray.
Wear disposable gloves to keep oils from your hands off printer components. Have a small flashlight ready to see inside dark areas.
Keep your printer manual nearby. It shows specific cleaning access points for your model.
Step 3: Open Access Panels and Remove Cartridges
Most printers have panels designed for user access. Open the main printer cover where you normally replace ink or toner cartridges.
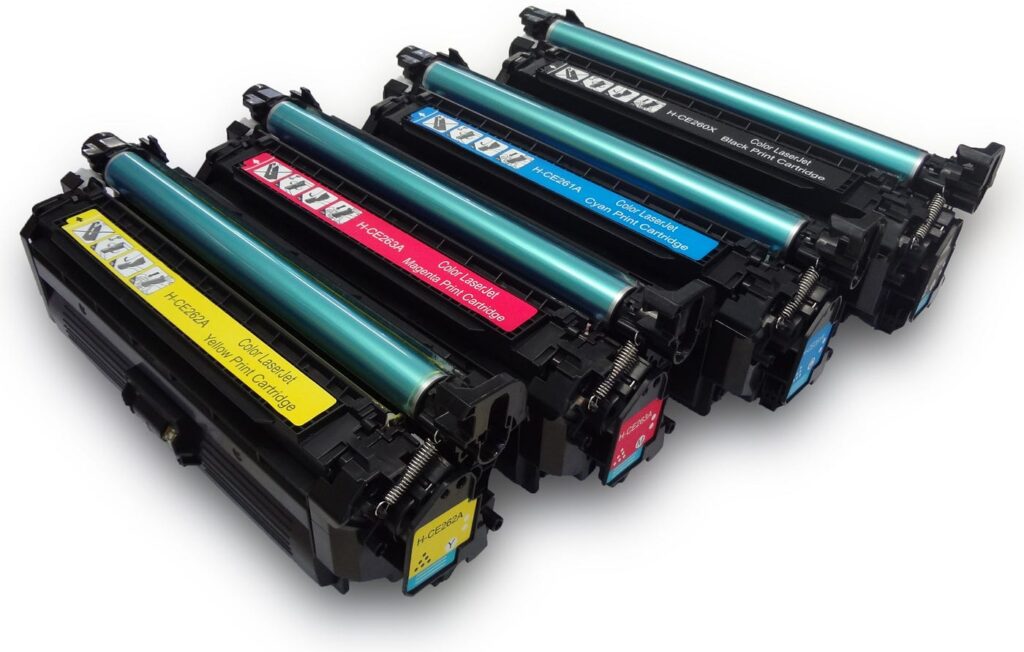
Remove all ink cartridges or toner cartridges carefully. Place them on paper towels to catch any drips. Keep cartridges upright to prevent leaking.
Check for additional access doors. Many printers have rear panels that open for paper jam removal. These provide excellent access for cleaning printer inside areas.
Some models have bottom access panels. Check your manual to identify all removable panels. Don’t force any covers—if it doesn’t open easily, it’s not meant to be opened by users.
Leave panels and cartridges out during the entire cleaning process. This ensures everything dries completely before reassembly.
Take photos with your phone before removing parts. These pictures help you remember how everything goes back together.
Step 4: Remove Loose Dust and Debris
Start by removing surface dust with compressed air. Hold the can upright about 6 inches from printer components. Use short bursts rather than continuous spray.
Blow air through the paper path from input tray to output tray. This dislodges paper particles trapped along the route. Tilt the printer slightly to help debris fall out.
Use a soft brush to gently sweep dust from visible surfaces. Pay special attention to corners where dust accumulates. Brush toward openings so debris falls out rather than deeper inside.
Don’t blow air directly at sensors or circuit boards. These sensitive components can be damaged by strong air pressure. Instead, brush them gently with a dry cloth.
Remove the paper tray completely and clean underneath it. This area often contains paper scraps and dust clumps. Vacuum around the printer to catch falling debris.
Step 5: Clean Paper Rollers Thoroughly
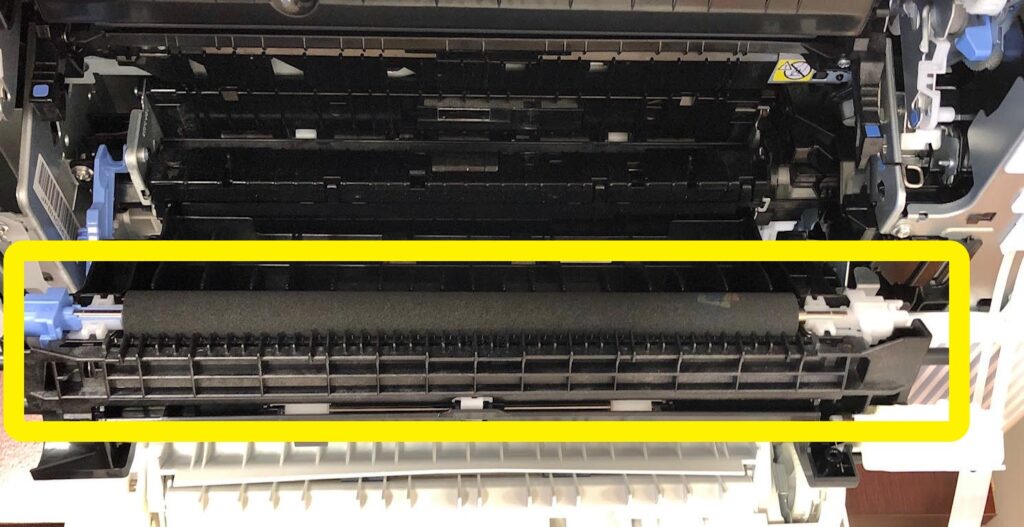
Paper rollers are critical for smooth operation. Dirty rollers cause paper jams, misfeeds, and multiple sheets feeding at once. Cleaning printer inside rollers should be your top priority.
Locate the rubber rollers in the paper feed area. They’re usually dark gray or black cylindrical parts. Dampen a lint-free cloth with isopropyl alcohol.
Wipe each roller while rotating it manually. Turn the roller completely around to clean its entire surface. You’ll see dirt and paper dust transfer to the cloth.
For stubborn buildup, use a cotton swab dipped in alcohol. Gently scrub textured areas where debris sticks. Never use excessive force that might tear the rubber.
Check for shiny or glazed spots on rollers. These indicate worn areas that might need replacement. Consult HP’s official printer maintenance guide for roller replacement procedures if needed.
Let rollers dry completely before closing the printer. Alcohol evaporates quickly, usually within 2-3 minutes.
Step 6: Clean Print Heads and Nozzles
Print head cleaning prevents streaks, missing colors, and faded prints. External cleaning complements internal printer cleaning cycles.
For inkjet printers, locate the print head carriage where cartridges sit. Dampen a cotton swab with distilled water (not alcohol, which can damage inkjet components).
Gently wipe around the print head area, avoiding direct contact with nozzles. Remove any visible ink buildup on surrounding plastic parts. Don’t press hard against the print head itself.
For laser printers, focus on the toner drum area. Use a dry, lint-free cloth to gently wipe any toner dust. Never touch the drum surface with your fingers or alcohol.
After external cleaning, run your printer’s built-in cleaning cycle. Access this through your printer software on your computer. The internal cleaning cycle uses ink or toner to flush nozzles.
Run a test print to check results. If quality is still poor, repeat the cleaning cycle once more.
Step 7: Clean Sensors and Internal Components
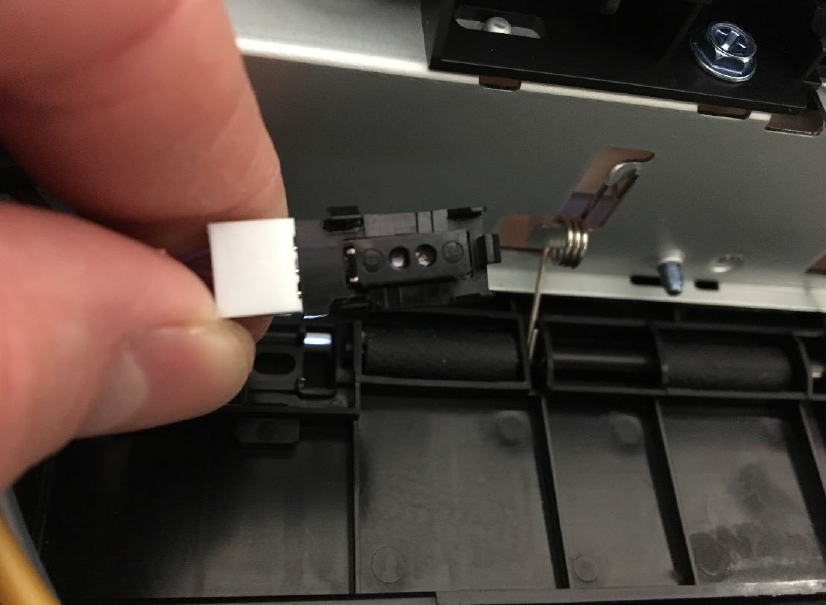
Sensors control paper detection, ink levels, and print positioning. Dirty sensors cause error messages and printing failures.
Locate sensors using your flashlight. They usually look like small black plastic pieces with clear or dark lenses. Common locations include the paper path and near cartridge slots.
Gently wipe sensor lenses with a dry microfiber cloth. If very dirty, barely dampen the cloth with distilled water. Never use alcohol on sensors—it can damage protective coatings.
Clean the encoder strip if your printer has one. This clear or marked plastic strip helps the print head track position. Wipe it gently with a barely damp cloth, then dry immediately.
Check for any loose screws or parts inside. Tighten loose screws gently. Remove any foreign objects like paper clips or staples.
Wipe down plastic interior surfaces with a slightly damp cloth. This removes general dust and improves air quality inside the printer.
Step 8: Reassemble and Test Your Printer
After cleaning printer inside components, let everything air dry for 10 minutes. Even if parts look dry, residual moisture can cause problems.
Reinstall ink or toner cartridges carefully. Push until you hear a click confirming proper seating. Incorrect installation causes error messages.
Close all access panels firmly but gently. Loose panels trigger safety sensors that prevent printing. Make sure latches engage completely.
Reconnect power and data cables. Plug into the wall outlet and turn the printer on. Wait for initialization to complete—this takes 30-60 seconds.
Load fresh paper and print a test page. Check for clean, clear output without streaks or smudges. Run multiple test pages to ensure paper feeds smoothly.
If you notice any error messages, power cycle the printer. Turn it off, wait 30 seconds, then turn it back on. This often clears sensor errors after cleaning.
Additional Tools and Products for Printer Maintenance
Specialized printer cleaning products make maintenance easier and more effective. While basic supplies work well, these tools offer advantages for regular cleaning.
Printer cleaning sheets are pre-moistened pages that you run through the printer like regular paper. They clean rollers automatically as they pass through. Use these monthly between deep cleanings.
Cleaning kits designed for specific printer brands include all necessary supplies. Canon, Epson, and Brother offer manufacturer-approved kits. These ensure you’re using safe products for your model.
Anti-static brushes prevent dust from sticking to cleaned surfaces. Regular brushes can create static that attracts more dust. Anti-static versions keep components cleaner longer.
Print head cleaning solution is stronger than isopropyl alcohol for stubborn inkjet clogs. Use it sparingly and only when regular cleaning fails. Follow product instructions exactly.
Digital maintenance logs help you track cleaning dates. Set phone reminders for regular cleaning schedules. Consistent maintenance prevents major problems.
Consider a printer cover to keep dust out between uses. This simple accessory dramatically reduces how often you need deep cleaning. Remove the cover before printing to prevent fire hazards.
Common Mistakes When Cleaning Printer Inside Components
Using Too Much Liquid
Excessive moisture damages electronic components and causes rust. Many people soak cloths too heavily when cleaning printer inside areas. Always use barely damp cloths, never dripping wet ones. Squeeze out excess liquid before wiping any printer part.
Touching the Print Head or Drum Directly
Fingerprints and oils from your skin ruin print heads and laser printer drums. These components are extremely sensitive. Always use tools or cloths, never bare hands. Even with gloves, avoid direct contact when possible.
Forcing Stubborn Parts
Stuck rollers or panels often break when forced. If something doesn’t move easily, look for release tabs or screws. Check your manual rather than pulling harder. Broken clips and tabs are expensive to repair.
Cleaning While the Printer Is On
Some people try quick cleanings without unplugging. This risks electric shock and can damage electronics. Moving parts can pinch fingers. Always fully power down and unplug first, no exceptions.
Using Household Cleaners
Window cleaner, bleach, and general-purpose cleaners contain chemicals that harm printers. They leave residue that attracts more dust or damages plastic parts. Stick to isopropyl alcohol and distilled water only.
Skipping the Drying Time
Rushing reassembly while parts are still damp causes short circuits and corrosion. Even if you’re in a hurry, wait the full 10 minutes. Replacing damaged electronics costs far more than a few minutes of patience.
Ignoring the Paper Path
Many people clean visible areas but ignore the paper path where jams occur. Paper fibers accumulate where you can’t easily see. Use compressed air and brushes to reach deep into the paper channel.
Frequently Asked Questions About Cleaning Printer Inside
How often should I clean the inside of my printer?
Clean your printer inside every 3-6 months for typical home use. High-volume printing requires monthly cleaning. If you notice print quality issues, paper jams, or error messages, clean immediately regardless of schedule. Dusty environments may need more frequent cleaning.
Can I use water instead of isopropyl alcohol?
Distilled water works for basic cleaning but takes much longer to dry. Use water for print heads and sensors where alcohol might cause damage. Use isopropyl alcohol for rollers and general interior surfaces. Never use tap water—minerals leave residue that attracts more dust.
Will cleaning void my printer warranty?
Basic user-level cleaning doesn’t void warranties. Printer manufacturers expect users to perform routine maintenance. Only opening areas marked “No User Serviceable Parts” or removing warning labels voids coverage. Check your warranty terms and stick to access panels mentioned in your manual.
What if my printer still has problems after cleaning?
Cleaning fixes maintenance issues, not hardware failures. If problems persist after thorough cleaning, you may have worn rollers, failing sensors, or damaged print heads. Run printer diagnostics from your computer. Consider professional service for issues that cleaning doesn’t resolve.
Conclusion

Cleaning printer inside components is essential maintenance that most people overlook. Dust and debris cause 70% of common printer problems, yet a simple 20-minute cleaning prevents these issues completely. You’ve learned exactly how to safely clean rollers, sensors, print heads, and the paper path.
Regular internal cleaning extends your printer’s lifespan by years and maintains print quality at factory levels. Schedule cleanings every few months and you’ll avoid frustrating jams and expensive repairs. The small investment of time saves hundreds in replacement costs and wasted supplies.
Don’t wait until your printer fails to start cleaning. Grab your lint-free cloths and isopropyl alcohol today. Your printer will reward you with years of reliable, high-quality printing. Take 20 minutes this weekend to give your printer the deep cleaning it deserves.
Master Printer Calibration: Fix Alignment & Boost Print Quality Fast Read More


