
Introduction
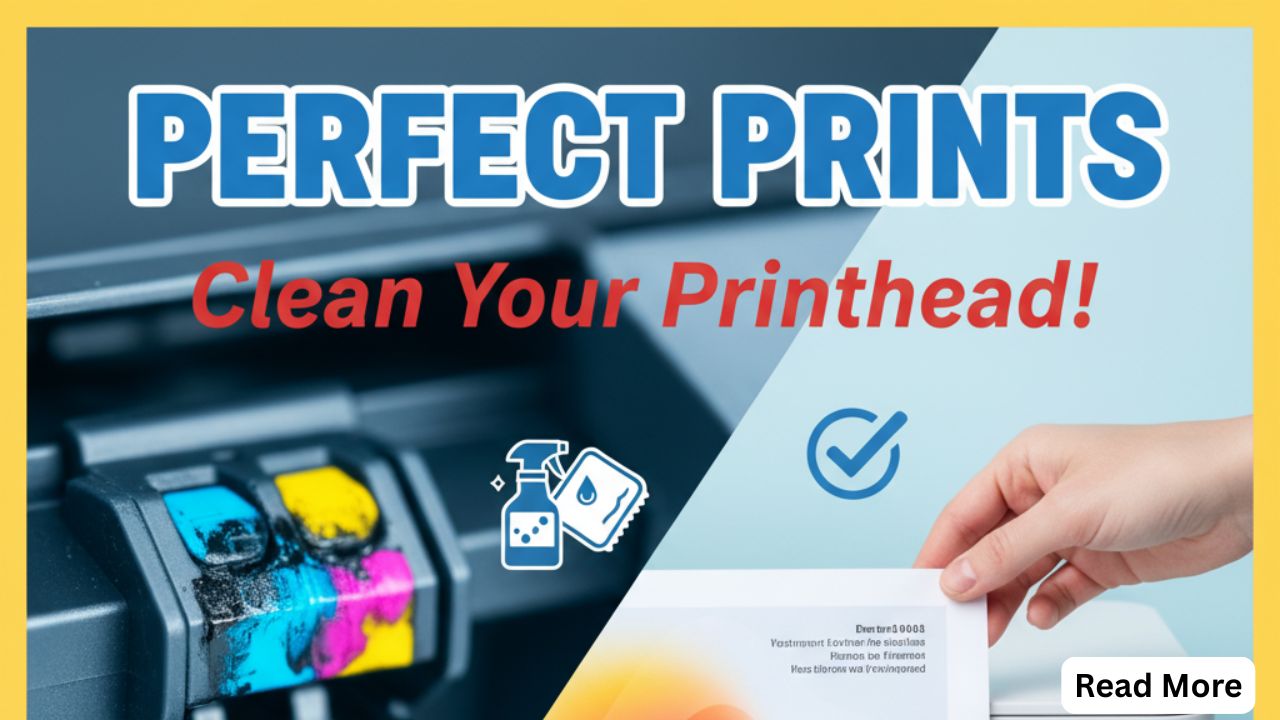
When you need to clean printer printhead components, your prints are probably looking terrible. Streaky lines, faded colors, or blank spots mean your printhead needs attention. The good news? You can fix this yourself in under 30 minutes.
Most people throw away perfectly good printers because of clogged printheads. Don’t make that mistake. This guide shows you exactly how to clean your printhead the right way. You’ll learn automatic cleaning methods, manual techniques, and professional tricks that save you money.
Whether you have an HP, Canon, Epson, or Brother printer, these methods work. Let’s get your printer producing perfect prints again.
What Is a Printer Printhead?
A printer printhead is the component that puts ink onto paper. Think of it as the heart of your inkjet printer. It contains tiny nozzles that spray microscopic ink droplets in precise patterns.
These nozzles are incredibly small. Some are thinner than a human hair. When they work properly, they create sharp text and vibrant images. But they clog easily.
Ink dries inside the nozzles when you don’t print regularly. Dust and paper fibers can also block them. Old or poor-quality ink causes buildup too. When nozzles clog, your prints show white lines, missing colors, or blurry text.
Some printers have built-in printheads. Others use replaceable cartridges with printheads attached. Knowing which type you have helps you clean it correctly.
Regular printhead cleaning prevents most problems. Clean prints mean a healthy printhead. Taking care of this small component extends your printer’s life by years.
5 Proven Methods to Clean Printer Printhead
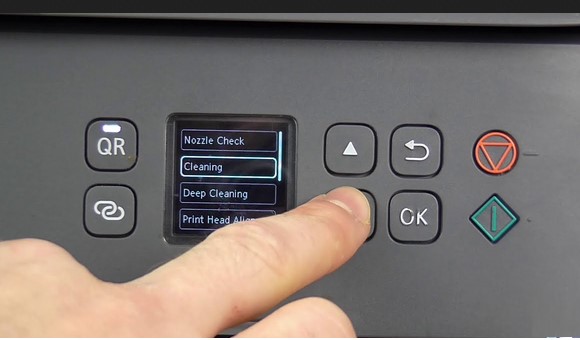
Method 1: Use the Built-In Cleaning Cycle
Every inkjet printer has an automatic cleaning function. This should always be your first try. It’s the safest and easiest option.
For Windows:
- Open Control Panel
- Go to “Devices and Printers”
- Right-click your printer
- Select “Printing Preferences”
- Find the “Maintenance” or “Services” tab
- Click “Clean Printhead” or “Head Cleaning”
- Follow the on-screen steps
For Mac:
- Open System Preferences
- Click “Printers & Scanners”
- Select your printer
- Click “Options & Supplies”
- Go to the “Utility” tab
- Select “Open Printer Utility”
- Click “Clean Print Heads”
The process takes 2-5 minutes. Your printer will pump cleaning solution through the nozzles. This dissolves light clogs and dried ink.
Run a test print afterward. Many printers offer a nozzle check pattern. Print this to see if all colors appear correctly. If problems remain, run the cleaning cycle again.
Don’t run it more than three times in a row. Excessive cleaning wastes ink and can damage the printhead. If three cycles don’t fix it, move to manual cleaning.
Method 2: Deep Cleaning with Printer Software
Most printer manufacturers include deep cleaning options in their software. This uses more cleaning solution than the standard cycle.
Using manufacturer software:
- Download the latest software from HP, Canon, Epson, or Brother
- Install the printer utility program
- Open the program and find your printer
- Look for “Deep Clean” or “Power Clean” option
- Start the process and wait
Deep cleaning takes longer than regular cleaning. It might use 10-15 minutes. The printer pushes more cleaning fluid through the nozzles at higher pressure.
This method works for moderate clogs. It’s especially effective for printers that sat unused for weeks. The extra cleaning power removes stubborn dried ink.
After deep cleaning, let your printer rest for 6-8 hours. This gives the cleaning solution time to dissolve dried ink. Then run a test print. You can find official printer utilities at HP’s support site or your specific manufacturer’s website.
Method 3: Manual Cleaning with Distilled Water
When automatic cleaning fails, manual cleaning works. This method requires care but gives excellent results.
What you need:
- Distilled water (never use tap water)
- Lint-free cloths or coffee filters
- Cotton swabs
- Small container
- Paper towels
Step-by-step process:
First, turn off and unplug your printer. Open the cartridge access door. Remove the ink cartridges carefully. Place them on paper towels, nozzle-side up.
Look for the printhead. On some printers, it comes out with the cartridges. On others, it stays inside the printer. Identify which type you have.
Pour a small amount of distilled water into your container. Dip a lint-free cloth into the water. Wring it out so it’s damp, not dripping.
Gently wipe the printhead surface where it contacts the paper. Use light pressure. Don’t scrub hard or you’ll damage the nozzles.
For the nozzle plate (the part with tiny holes), barely touch it with the damp cloth. Just enough to pick up loose ink. Never press or rub the nozzles directly.
If you see dried ink buildup, dampen a cotton swab with distilled water. Carefully clean around the nozzles. Let the moisture dissolve the ink rather than wiping forcefully.
Place the printhead on a damp (not wet) lint-free cloth. Nozzle-side down. Let it sit for 15-30 minutes. The moisture will help dissolve clogs from below.
Dry everything gently with a clean cloth. Reinstall the printhead and cartridges. Run a test print.
Method 4: Use Printhead Cleaning Solution
For stubborn clogged printhead problems, commercial cleaning solutions work better than water. These are specially formulated to dissolve dried ink.
Popular cleaning solutions:
- Printhead cleaning kits (available on Amazon)
- Isopropyl alcohol (91% or higher)
- Ammonia-free window cleaner
Follow the same manual cleaning steps as Method 3. Replace distilled water with your chosen cleaning solution. These products break down ink more effectively than water alone.
Never use tap water, rubbing alcohol below 70%, or harsh chemicals. They can permanently damage your printhead. Stick to products made for printers.
Cleaning solution method works best for printers unused for months. The stronger formula dissolves heavy ink buildup that water can’t touch.
After using cleaning solution, rinse the printhead with distilled water. This removes any residue. Let it dry completely before reinstalling.
Method 5: Soak Method for Severe Clogs
This is the nuclear option. Use it only when nothing else works. It’s for printheads with severe blockages from months of neglect.
How to soak a printhead:
Remove the printhead completely from your printer. Check your manual if you’re unsure how to do this safely.
Fill a small, shallow dish with cleaning solution or distilled water. The liquid should be 1/4 inch deep.
Place the printhead in the dish, nozzle-side down. Only the nozzle plate should touch the liquid. Don’t submerge the entire printhead or you’ll damage electronics.
Let it soak for 3-4 hours. For extreme clogs, you can soak overnight. Check it every hour. You’ll see ink dissolving into the liquid.
After soaking, rinse the printhead with distilled water. Pat it dry gently with a lint-free cloth. Let it air dry for 2-3 hours before reinstalling.
This method has risks. Water can damage circuits if you’re not careful. Only try it as a last resort before buying a new printhead.
Additional Tools and Professional Tips
Printhead Cleaning Kits make the job easier. They include syringes, tubing, and professional cleaning solution. You can inject solution directly through the nozzles. This gives better results than wiping alone.
Ultrasonic Cleaners work amazingly for removable printheads. Fill the cleaner with distilled water and cleaning solution. The ultrasonic waves break up dried ink without touching the printhead. This is what repair shops use.
Maintenance Cartridges keep printheads clean between jobs. Some Epson printers use these. They automatically flush the printhead to prevent clogs. If your printer supports them, use one.
Print Regularly to prevent clogs. Even if you don’t need anything, print a test page weekly. This keeps ink flowing through the nozzles. Fresh ink doesn’t dry and clog as easily.
Use quality ink. Cheap refills often cause clogs. They use different formulas that don’t flow smoothly. The money you save isn’t worth the headache.
Store ink cartridges properly. Keep them in a cool, dry place. Don’t let them sit in your printer unused for months. Remove and cap them if you won’t print for a while.
Common Mistakes to Avoid
Mistake 1: Using Tap Water
Tap water contains minerals that leave deposits in the nozzles. These make clogs worse. Always use distilled water for printer nozzle cleaning. It costs less than two dollars at any grocery store.
Mistake 2: Applying Too Much Pressure
Printheads are delicate. Hard scrubbing damages the nozzle plate permanently. Use gentle wiping motions. Let cleaning solution do the work, not your muscle.
Mistake 3: Running Too Many Cleaning Cycles
Each cleaning cycle uses a lot of ink. Running ten cycles in a row wastes more ink than new cartridges cost. Stop after three attempts. Switch to manual cleaning instead.
Mistake 4: Not Letting Things Dry
Moisture and electronics don’t mix. After cleaning, let everything dry completely. Rushing this step can short-circuit your printhead. Wait at least an hour before reinstalling components.
Mistake 5: Cleaning When Not Needed
Don’t clean your printhead on a schedule. Only clean it when prints look bad. Unnecessary cleaning wastes ink and wears out the printhead faster.
Mistake 6: Forgetting to Test First
Always print a nozzle check before and after cleaning. This shows which colors are clogged and whether cleaning helped. It guides your next steps.
Mistake 7: Giving Up Too Soon
Sometimes clogs take multiple approaches to fix. One cleaning cycle might not do it. Try different methods before assuming your printhead is dead. Persistence pays off.
Troubleshooting Guide
Problem: Only one color is missing
This means only one nozzle group is clogged. Focus cleaning on that specific color. Some printers let you clean individual colors. This saves ink compared to cleaning everything.
Problem: Cleaning cycles don’t help at all
Your clog is too severe for automatic cleaning. Move directly to manual methods. The printhead needs physical contact with cleaning solution to dissolve the blockage.
Problem: Prints are better but not perfect
Run one more cleaning cycle. Sometimes it takes two or three treatments to fully clear nozzles. Check your test print after each cycle. You should see gradual improvement.
Problem: Printhead works after cleaning but clogs again quickly
Your ink is old or poor quality. Replace it with fresh, name-brand cartridges. Also check that your storage area isn’t too hot. Heat dries out ink faster.
Problem: Nozzle check shows random patterns
This might be an alignment issue, not a clog. Run the printhead alignment utility in your printer software. Misalignment looks similar to clogs but needs different treatment.
Problem: Nothing prints after cleaning
You may have damaged the printhead or got water where it shouldn’t be. Let everything dry for 24 hours. Try again. If still nothing works, the printhead might need replacement.
Frequently Asked Questions
Q: How often should I clean my printhead?
Only clean it when prints look bad. Don’t clean on a schedule. Most people never need to clean manually if they print weekly. Let your printer’s automatic cleaning handle routine maintenance.
Q: Can I use alcohol to clean printheads?
Yes, but only 91% or higher isopropyl alcohol. Lower percentages contain too much water and other additives. Never use rubbing alcohol meant for wounds. It has oils that damage printheads.
Q: Will cleaning damage my printer?
Not if you follow instructions carefully. Automatic cleaning is completely safe. Manual cleaning has small risks if you use wrong liquids or too much force. Gentle handling prevents damage.
Q: How do I know if my printhead is dead?
If nothing prints after multiple cleaning methods and the nozzle check is blank, your printhead might be finished. Try the soak method as a last resort. If that fails, replacement is your only option.
Q: Can I clean a printhead without removing it?
Yes. Most automatic and deep cleaning methods work without removal. Manual cleaning works better with removal, but you can clean accessible parts while installed. Check your printer manual for guidance.
Q: Why does my printer waste so much ink during cleaning?
Cleaning cycles pump ink through the nozzles to clear clogs. This ink doesn’t go on paper. It collects in waste pads inside the printer. It’s the price of maintenance, but regular printing reduces the need for cleaning.
Conclusion
Learning to clean printer printhead components saves money and frustration. Most clog problems fix easily with built-in cleaning cycles. Stubborn issues need manual cleaning, but the process is straightforward.
Start with automatic cleaning. If that doesn’t work, try deep cleaning next. Manual methods with distilled water handle most remaining problems. Save aggressive techniques like soaking for truly severe cases.
Prevention beats cleaning. Print something weekly to keep ink flowing. Use quality ink and store cartridges properly. These simple habits prevent 90% of clog issues.
Your printer can last for years with proper printhead maintenance. Don’t throw it away at the first sign of trouble. Follow this guide and you’ll be printing perfectly in no time. Save this article for future reference. The next time you see streaky prints, you’ll know exactly what to do.
Fix Printer Spooler Errors Fast: Simple Solutions That Actually Work Read More.


