
Introduction
Calibrate printer for better quality output and transform your printing experience from mediocre to professional-grade. Whether you’re a photographer printing cherished memories, a business professional creating client presentations, or simply tired of wasting ink on disappointing printouts, proper printer calibration is the key to achieving outstanding results. When your printer is properly calibrated, colors appear more accurate, text becomes sharper, and images display with greater detail and contrast. This comprehensive guide will walk you through the complete calibration process, from basic alignment to advanced color management, ensuring you get the best possible print quality from your device—regardless of whether you use an inkjet or laser printer from any major manufacturer.
What Is Printer Calibration?
Printer calibration is the process of adjusting your printer’s settings to ensure it produces the most accurate and consistent output possible. This critical maintenance procedure aligns the print heads, balances color output, and synchronizes what you see on your screen with what appears on paper. Unlike routine tasks like changing ink cartridges, calibration fine-tunes the printer’s internal systems for optimal performance.
The calibration process addresses two main components: mechanical calibration and color calibration. Mechanical calibration involves aligning the print heads to ensure text and images appear precisely where they should on the page, without skewing or misalignment. Color calibration, meanwhile, adjusts how your printer reproduces colors to match what you see on your monitor as closely as possible, correcting for variations in ink formulation, paper types, and the printer’s color interpretation.
Most modern printers include built-in calibration utilities, but these basic tools often don’t achieve professional-level results. Advanced calibration techniques can significantly improve print quality beyond factory settings, especially for photo printing, graphic design work, or any situation where color accuracy is paramount. A properly calibrated printer not only produces better-looking results but also operates more efficiently, potentially saving ink and reducing paper waste from reprinting.
7 Steps to Calibrate Your Printer for Better Print Quality
Step 1: Run Your Printer’s Built-in Alignment Tool
Start with the basic alignment utility included with your printer:
- Open your printer’s control panel on your computer (Windows: Control Panel > Devices and Printers; Mac: System Preferences > Printers & Scanners)
- Select your printer and look for “Maintenance,” “Toolbox,” or “Utilities” options
- Choose “Print Head Alignment,” “Alignment Utility,” or similar option
- Follow the on-screen instructions, which typically involve printing a test page with alignment patterns
- Examine the printed patterns and enter the numbers of the best-aligned samples when prompted
This mechanical alignment ensures your print heads are properly positioned relative to each other and the paper. Most printers will print a series of lines or boxes and ask you to select which ones look most aligned. This process corrects issues like lines not printing straight or text appearing blurry on one side. For best results, perform this alignment after installing new ink cartridges or if you notice misaligned text or images.
Step 2: Clean Print Heads Before Further Calibration
Clogged nozzles can interfere with accurate calibration:
- Access your printer’s maintenance menu as in Step 1
- Select “Print Head Cleaning,” “Nozzle Check,” or similar option
- Run the cleaning cycle (be aware this uses some ink)
- Print a nozzle check pattern to verify all colors are printing clearly
- If streaks or missing lines appear, run the cleaning cycle again
- For persistent clogs, run a “Deep Cleaning” cycle if your printer offers this option
Clean print heads are essential for accurate calibration as clogged nozzles can make it impossible to achieve consistent colors. The nozzle check pattern should show solid, unbroken lines for each color your printer uses. Note that excessive cleaning can waste ink, so only run additional cleaning cycles if the nozzle check shows problems. For extremely stubborn clogs, consult your printer manual for model-specific deep cleaning procedures.
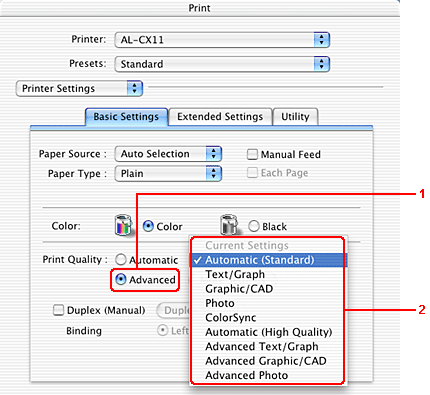
Step 3: Adjust Basic Color Settings
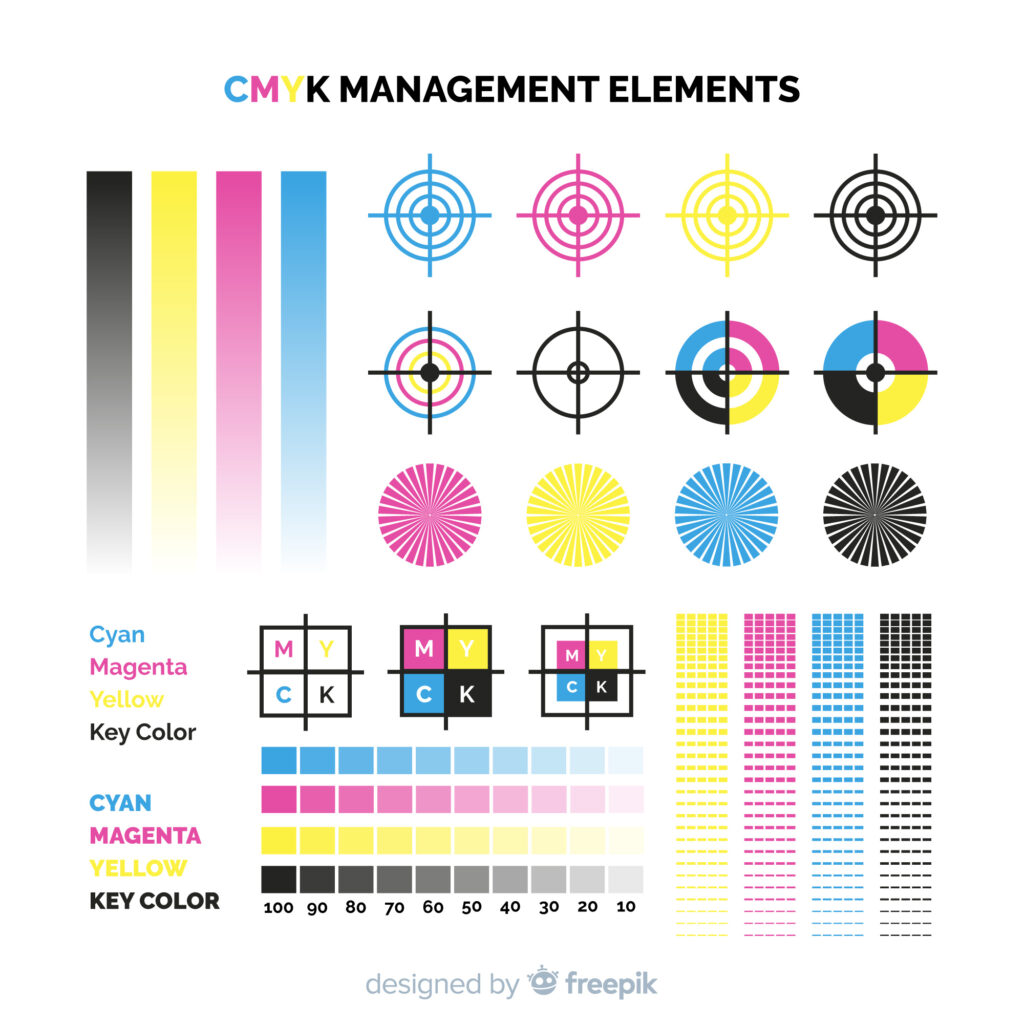
Fine-tune your printer’s color output through driver settings:
- Open the document you wish to print
- Access print settings (File > Print > Properties or Preferences)
- Look for “Color Management,” “Color Options,” or “Quality” tabs
- Adjust settings like brightness, contrast, and saturation
- Consider reducing “color intensity” slightly if prints appear oversaturated
- For photo printing, try “Photo Enhancement” or “Photo Optimization” modes
- Print a test page after each significant adjustment
These software-based adjustments can dramatically improve output without specialized equipment. Most printer drivers offer presets for different types of documents (photos, text, graphics), but manual adjustments often yield better results. Pay special attention to the paper type selection, as this affects how much ink the printer applies—using the wrong setting can result in oversaturated or washed-out prints.
Step 4: Calibrate Your Monitor
Accurate printer calibration requires a properly calibrated display:
- Use a hardware calibration tool like X-Rite i1Display Pro or Datacolor SpyderX
- If hardware calibration isn’t available, use built-in OS tools (Windows: Display Color Calibration; Mac: Display Calibrator Assistant)
- Adjust your monitor’s brightness to around 120 cd/m²
- Set color temperature to 6500K (standard daylight)
- Calibrate in the lighting conditions where you normally work
- Save your color profile and ensure it loads at startup
Monitor calibration ensures what you see is what you’ll get. Without a calibrated monitor, you might make adjustments that actually worsen your prints because you’re compensating for display inaccuracies. Hardware calibration tools provide the most accurate results, but the built-in OS utilities can improve results significantly over uncalibrated displays. Remember that ambient light affects perception—always evaluate prints under consistent lighting conditions, ideally using a color-balanced light source.
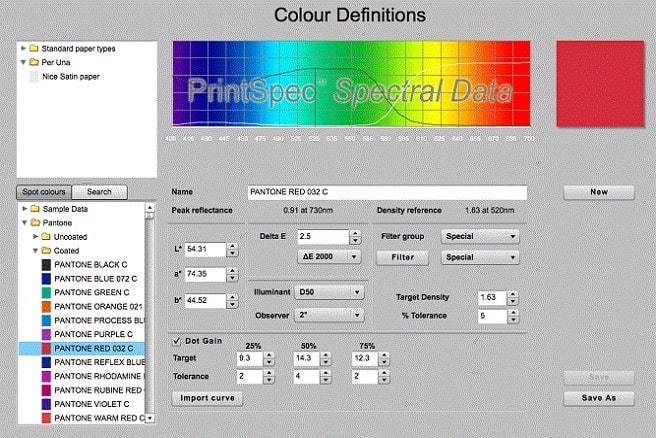
Step 5: Create and Use Custom ICC Profiles
For professional-level results, implement color management profiles:
- Purchase a color calibration kit with a spectrophotometer (X-Rite ColorMunki or similar)
- Install the associated software
- Print the provided color target sheet
- Scan the printed target with the spectrophotometer
- Let the software generate a custom ICC profile for your specific printer/ink/paper combination
- Install the profile in your operating system
- Select this profile when printing from photo editing software
ICC profiles are mathematical models that describe how your specific printer reproduces colors on particular paper. These profiles compensate for your printer’s unique characteristics and the properties of different papers. While this step requires specialized equipment, the results are dramatically better than any generic calibration. If purchasing equipment isn’t feasible, some paper manufacturers offer downloadable profiles for their papers with common printer models, or you can use professional print labs that offer custom profiling services for a fee.
Step 6: Optimize Print Settings for Different Paper Types
Different papers require different settings:
- Create separate calibration profiles for each type of paper you commonly use
- For glossy photo paper, slightly increase contrast and reduce brightness
- For matte papers, increase brightness slightly and ensure “high quality” mode is selected
- For plain paper, prioritize ink efficiency and faster printing speeds
- Store your optimized settings as presets for each paper type
- Label these presets clearly (e.g., “Portrait Photos-Premium Glossy”)
Paper dramatically affects print quality. Glossy papers typically offer better color vibrancy but can show glare, while matte papers reduce reflections but may have slightly less color pop. Specialized papers like canvas, fine art, or baryta require specific settings for optimal results. Creating named presets saves time and ensures consistent results. Remember that higher-quality papers almost always produce better results regardless of printer model.
Step 7: Perform Regular Maintenance and Recalibration
Maintain calibration accuracy over time:
- Recalibrate after changing any ink cartridge
- Perform basic alignment checks monthly for frequently used printers
- Create new ICC profiles whenever you change paper brands or types
- Update printer firmware regularly
- Store paper properly to prevent humidity issues affecting print quality
- Clean the printer’s external sensors and paper path quarterly
Calibration isn’t a one-time process. Environmental changes, aging components, and new supplies all affect print quality over time. Regular maintenance prevents drift and ensures consistent output. Keep records of which settings work best for different projects, and consider labeling paper packages with notes about optimal settings. For critical print jobs, always run a small test print before committing to large or expensive print runs.
Additional Tools and Resources for Advanced Printer Calibration

Specialized Calibration Software
For those seeking professional results:
- DisplayCAL: Free, open-source display calibration software with advanced features
- Datacolor SpyderPrint: Comprehensive printer profiling solution for photographers
- ColorThink Pro: Advanced color management toolset for analyzing and editing profiles
- Adobe Color Printer Utility: Free calibration patterns for visual calibration
- Printer manufacturers’ advanced utilities: Canon Print Studio Pro, Epson Print Layout, etc.
These software packages extend calibration capabilities beyond basic utilities. Professional-grade software allows for more precise adjustments and can handle complex color management workflows. Many include features for evaluating existing profiles, comparing output across different devices, and simulating how prints will appear under different lighting conditions. While some have steep learning curves, the improvement in output quality justifies the investment for serious photographers or designers.
Understanding Printer Color Gamuts
Knowledge of color space limitations improves results:
- Most printers can’t reproduce all visible colors (limited “gamut”)
- sRGB, Adobe RGB, and ProPhoto RGB represent different color ranges
- Choose Adobe RGB or ProPhoto RGB for working space when editing photos
- Use “relative colorimetric” rendering intent for most photography
- Use “perceptual” rendering for images with many out-of-gamut colors
- Consider your printer’s specific strengths when choosing papers and subjects
Understanding color theory improves calibration results. Different printers excel at reproducing different parts of the color spectrum—some may reproduce blues exceptionally well while others might excel at skin tones. Knowing your printer’s strengths helps you choose appropriate subjects and make more informed editing decisions. When editing photos, using a wide-gamut monitor in conjunction with wide color spaces preserves more color information for printing.
Troubleshooting Common Printer Calibration Issues

Colors Look Different Than on Screen
When prints don’t match your display:
- Verify your monitor is properly calibrated with hardware tools
- Check if you’re editing in Adobe RGB but printing in sRGB (color space mismatch)
- Ensure color management is enabled in your printing software
- Try switching rendering intents (relative colorimetric vs. perceptual)
- Evaluate prints under proper lighting (5000K-6500K color temperature)
- Allow prints to dry completely before final evaluation (colors can shift)
- Consider paper whiteness—bright white papers affect color perception
The most common calibration frustration is the screen-to-print mismatch. Remember that displays use additive RGB color (light) while printers use subtractive CMYK color (ink), resulting in inherent differences. Qualified success in color matching means getting prints that consistently reflect what you see on screen, even if they’re not identical. View prints under standardized lighting—ordinary household bulbs often have a strong yellow or blue cast that dramatically affects how colors appear.
Banding, Streaking, or Uneven Colors
For inconsistent prints with visible artifacts:
- Run multiple print head cleanings to clear partial clogs
- Try printing in a higher-quality mode that uses more passes
- Check if your paper is compatible with your printer’s ink type
- Enable “high speed” or “bidirectional” printing only for draft quality
- For horizontal banding, run additional alignment utilities
- For color posterization, ensure you’re working and printing in the correct bit depth
- Try updating or reinstalling printer drivers
Mechanical issues often cause banding and streaking. If standard cleaning cycles don’t help, consult your printer manual for deep cleaning procedures or printhead soaking methods. Some printers benefit from being used regularly—letting an inkjet sit unused for weeks can cause dried ink problems that affect calibration. If problems persist across multiple paper types and settings, the print head may be physically damaged and require replacement.
Black and White Printing Problems
Special considerations for monochrome printing:
- Use dedicated “black and white” or “grayscale” modes rather than converting to grayscale
- For high-end photo printers, enable “advanced B&W” modes that use multiple black inks
- Be aware that paper brighteners can cause color casts in B&W prints
- Consider dedicated B&W ink sets for professional monochrome printing
- Check for and disable any “automatic color enhancement” features
- Try different contrast settings to achieve preferred tonality
Black and white printing requires specific calibration approaches. Many color printers struggle with neutral grays, producing prints with subtle green or magenta casts. Dedicated B&W modes use sophisticated algorithms to produce neutral tones across the grayscale range. For critical B&W work, fine art papers without optical brighteners often produce more stable, neutral results than standard photo papers.
Color Management Software Conflicts
When software interferes with calibration:
- Ensure only one application is managing color at a time
- In printer dialog boxes, set color management to “Application Managed” or similar
- Disable printer color management when using software profiles
- Check if your editing software is applying profiles correctly
- For Adobe products, verify print settings in both the print dialog and printer properties
- Close competing applications that might affect color management
- Reset printer to factory defaults if settings become corrupted
Multiple color management systems working simultaneously can produce poor results. The rule of thumb is to let your most sophisticated software handle color management: typically your editing application (like Photoshop) rather than the printer driver. When printing from applications without color management, then let the printer handle color adjustments. Document your successful workflows to maintain consistency across projects.
FAQs About Printer Calibration
How often should I calibrate my printer?
For casual home use, calibrating every 2-3 months or after changing ink cartridges is sufficient. Professional users should perform basic alignment monthly and create new color profiles whenever changing paper types or after replacing ink cartridges. Environmental changes (humidity, temperature) can also affect printer performance, so consider recalibrating if you move your printer or experience seasonal changes that affect print quality.
Do I need expensive equipment to calibrate my printer effectively?
While professional calibration tools provide the best results, significant improvements can be achieved using your printer’s built-in utilities and careful visual assessment. Start with the free built-in tools, then consider investing in a monitor calibration device (starting around $100) for better screen-to-print matching. Full spectrophotometer kits for custom ICC profiles (starting around $400) are only necessary for professional work where color accuracy is critical.
Why do my prints look darker than on my screen?
This common issue usually occurs because monitors emit light while papers reflect it. To compensate, increase the brightness of your images by 10-15% before printing, or create specific “print preparation” presets in your editing software. Also check your monitor brightness—many displays are set too bright by default, causing prints to appear comparatively darker. Calibrating monitor brightness to around 120 cd/m² instead of the default 200+ cd/m² can significantly improve screen-to-print matching.
Can printer calibration reduce ink consumption?
Yes, proper calibration often reduces ink usage by ensuring the printer applies only the necessary amount of ink for accurate colors. Uncalibrated printers may compensate for alignment issues by applying excess ink, leading to oversaturated prints and faster cartridge depletion. Additionally, accurate calibration reduces waste from reprinting unsatisfactory results. For further ink efficiency, look for “economy” or “draft” presets in your printer settings for non-critical documents, and reserve high-quality settings for final outputs.
Conclusion
Learning how to calibrate printer for better quality output is an investment that pays dividends in superior results and reduced waste. The process may seem technical initially, but following the systematic approach outlined in this guide will help you achieve noticeably improved print quality with any printer model. Remember that calibration is not a one-time task but an ongoing process that should become part of your regular printer maintenance routine. By understanding the fundamentals of printer calibration and implementing the appropriate steps for your needs—whether basic alignment or advanced color profiling—you’ll consistently produce prints that accurately reflect your creative vision and meet professional standards.
As you become more comfortable with calibration procedures, you’ll develop an intuitive sense for which adjustments yield the best results for different projects. This knowledge allows you to optimize your workflow, save money on supplies, and achieve print quality that rivals professional print shops. Whether you’re printing family photos, business materials, or fine art reproductions, a well-calibrated printer transforms your digital images into stunning physical prints that truly represent your original vision.
Fix Printer Printing Half Page: 8 Effective Solutions for Cropped Output Read More.


Recent Comments