
Introduction
Expired ink cartridges sitting in your drawer don’t necessarily belong in the trash, despite what the expiration date suggests. Many people assume that once an ink cartridge passes its printed date, it becomes completely useless and must be replaced immediately. However, this common belief is largely a myth perpetuated by manufacturers who benefit from frequent cartridge purchases. The truth is that most ink cartridges remain functional well beyond their expiration dates, though they may require some troubleshooting and maintenance to work properly. Understanding how ink deteriorates over time, what those expiration dates really mean, and how to revive seemingly dead cartridges can save you significant money while reducing environmental waste. In this comprehensive guide, you’ll discover the science behind ink expiration, practical methods to test and restore old cartridges, and expert troubleshooting techniques that often bring expired ink back to life, allowing you to print quality documents without immediately spending money on replacements.
What Are Expired Ink Cartridges?
Expired ink cartridges are printer cartridges that have passed the manufacturer’s recommended “use by” or “expiration” date printed on their packaging or the cartridge itself. These dates typically range from 18 to 24 months from the manufacturing date, though some manufacturers use different timeframes.
The expiration date primarily indicates when the manufacturer guarantees optimal performance, not when the ink becomes completely unusable. Ink is a chemical mixture containing colorants (dyes or pigments), water, solvents, and additives that maintain consistency and prevent clogging. Over time, these components can separate, evaporate, or thicken, potentially affecting print quality.
However, calling these cartridges “expired” is somewhat misleading. Unlike food products that spoil and become dangerous, expired ink cartridges rarely become hazardous—they simply may not perform at peak levels. The ink might print lighter, colors may shift slightly, or nozzles might clog more easily. But with proper storage and troubleshooting, many expired cartridges work perfectly fine.
Manufacturers benefit financially when customers replace cartridges based solely on dates rather than actual functionality. The expiration date serves as a legal protection for manufacturers, ensuring they’re not liable for quality issues beyond that timeframe. It also encourages faster turnover and repeat purchases. Understanding this reality empowers you to make informed decisions about whether to use or discard aged cartridges based on actual performance rather than arbitrary dates.
6 Proven Ways to Test and Revive Expired Ink Cartridges
Step 1: Perform a Visual Inspection First
Before attempting any revival techniques, examine your expired cartridge carefully. Remove it from the packaging or your printer and look for obvious problems. Check the nozzle plate (the small section with tiny holes where ink exits) for dried ink crusts or debris. Inspect the cartridge body for cracks, leaks, or damage that would make revival impossible.
Gently shake the cartridge from side to side. You should hear or feel liquid moving inside. If the cartridge feels completely dry or you hear nothing, it may be genuinely depleted rather than simply expired. Look at the protective tape or seal—if it’s never been removed and the cartridge was stored properly, your chances of successful revival increase significantly.
Check the electrical contacts (the copper or gold-colored strips) for corrosion, dirt, or oxidation. These contacts communicate with your printer, and dirty contacts often cause “cartridge not recognized” errors that people mistakenly attribute to expiration. Clean contacts with a lint-free cloth slightly dampened with isopropyl alcohol, then let them dry completely before proceeding.
Step 2: Run Printer Cleaning Cycles
The simplest method to revive expired ink cartridges is using your printer’s built-in cleaning function. This process forces ink through the nozzles to clear blockages caused by dried ink. Access your printer’s maintenance menu through the control panel or through your computer’s printer settings.
Run a standard cleaning cycle first. Most printers offer “light,” “standard,” and “deep” cleaning options. Start conservatively to avoid wasting ink. After the cycle completes, print a nozzle check pattern or test page. This diagnostic print shows whether all colors and nozzles are functioning correctly.
If the first cleaning doesn’t solve the problem, wait 30 minutes before trying again. Running multiple cycles back-to-back can actually worsen clogs by drying ink in the nozzles. For stubborn blockages, perform a deep cleaning cycle, though be aware this uses significantly more ink. Some printers limit how many cleaning cycles you can run consecutively to prevent ink waste.
For detailed instructions specific to your printer model, visit the manufacturer’s support website for guides and troubleshooting videos. Different printer brands have varying cleaning procedures and terminology.
Step 3: Use the Warm Water Soak Method
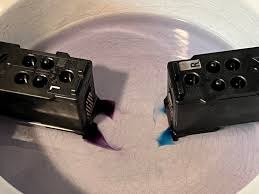
When cleaning cycles fail, physical intervention often works. The warm water soak method is particularly effective for cartridges with dried ink blocking the nozzles. Remove the cartridge from your printer and find a shallow dish or plate.
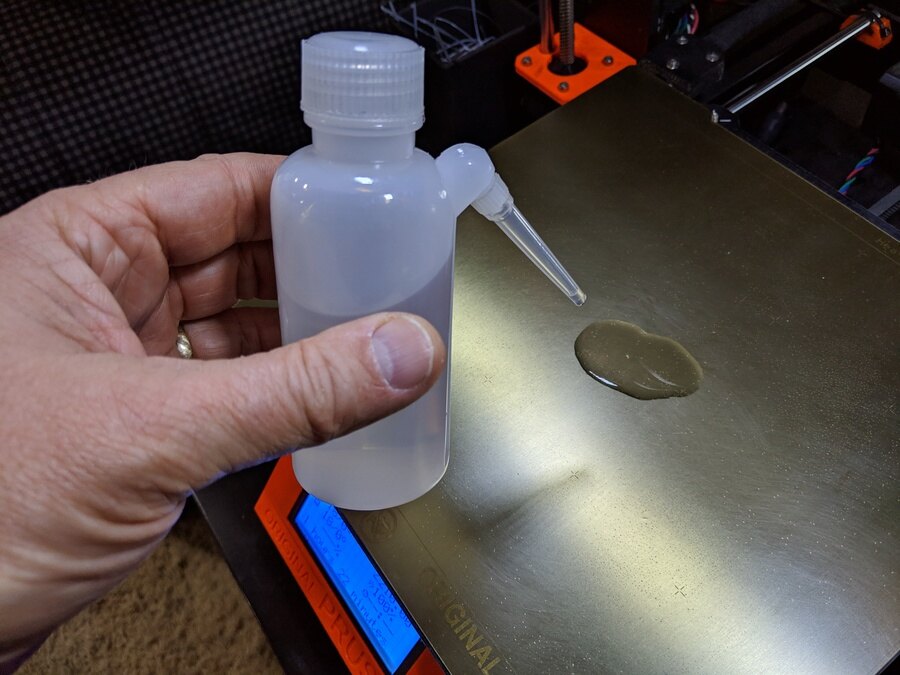
Pour warm (not hot) distilled water into the dish to a depth of about one-quarter inch. Distilled water is crucial because tap water contains minerals that can create additional clogs. Place the cartridge nozzle-side down in the water, ensuring only the nozzle plate contacts the water—don’t submerge the entire cartridge or get water on the electrical contacts.
Let the cartridge soak for 30 minutes to 2 hours depending on clog severity. The warm water gradually dissolves dried ink, allowing it to flow from the nozzles. You should see colored ink dispersing into the water, confirming the process is working. For extremely stubborn clogs, refresh the warm water every hour.
After soaking, gently blot (don’t wipe) the nozzle area with a lint-free cloth or paper towel. Let the cartridge air dry completely for at least 2-3 hours before reinstalling. Any moisture remaining on electrical contacts can damage your printer or cause connection errors.
Step 4: Try the Manual Priming Technique
Manual priming helps restart ink flow in cartridges where ink has settled or separated. This technique works best with cartridges that have been stored for extended periods. You’ll need a clean, lint-free cloth for this method.
Hold the cartridge with the nozzle facing down over the cloth. Gently tap the cartridge against the cloth 5-10 times. You’re trying to encourage ink to flow toward the nozzles through gentle vibration and gravity. Don’t shake violently or tap too hard, as this can damage internal components.
After tapping, you should see small amounts of ink transfer to the cloth. If no ink appears, the cartridge may be truly empty rather than expired. Some users also gently squeeze the sides of cartridges (only those with flexible bodies) to create pressure that pushes ink toward nozzles, though this risks creating leaks if done too forcefully.
Reinstall the cartridge and immediately run a cleaning cycle. The combination of manual priming followed by electronic cleaning often succeeds where either method alone fails. Print a test page to evaluate results.
Step 5: Apply the Alcohol Cleaning Method
For cartridges with severely dried nozzles that don’t respond to water soaking, isopropyl alcohol (rubbing alcohol) offers stronger dissolving power. Use 90% or higher concentration for best results, available at most pharmacies.
Dampen a cotton swab with isopropyl alcohol and gently clean the nozzle plate. Use circular motions to dissolve dried ink without pushing debris deeper into the nozzles. The alcohol evaporates quickly, making it safer for use near electronic components than water.
For extreme cases, you can perform an alcohol soak similar to the water method. Use a very shallow amount of alcohol and limit soaking time to 10-15 minutes, as prolonged exposure can damage some cartridge materials. Always allow complete evaporation (at least one hour) before reinstalling the cartridge.
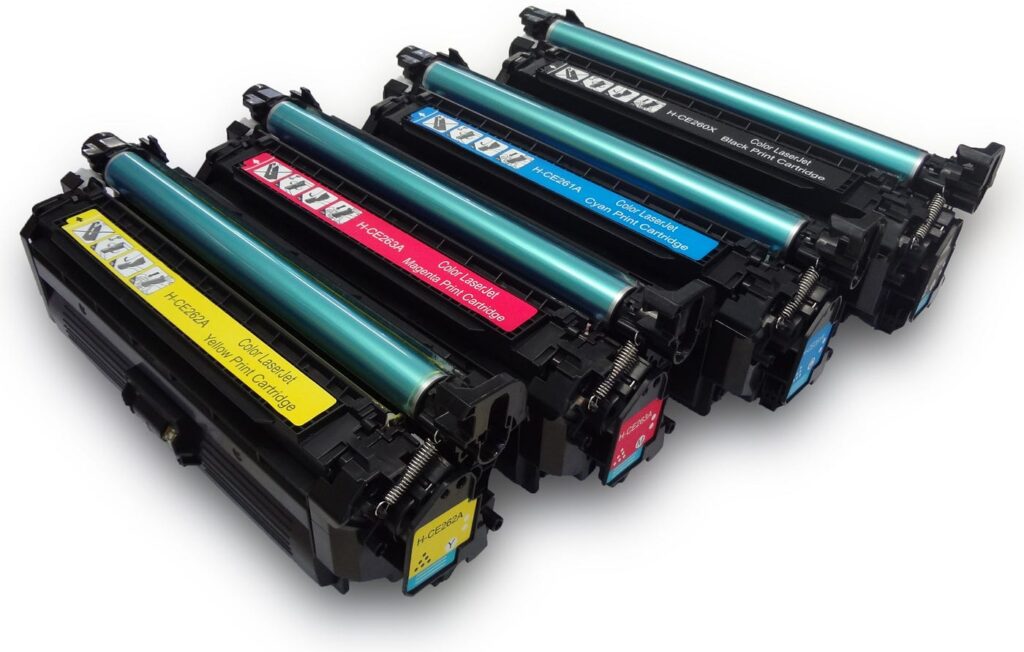
This method works particularly well with pigment-based inks, which are more prone to stubborn clogs than dye-based inks. However, some cartridge plastics react poorly to alcohol, so test on a small area first if possible.
Step 6: Check and Reset Printer Memory
Sometimes the problem isn’t the ink itself but your printer’s memory. Printers track cartridge installation dates and page counts, sometimes refusing to recognize cartridges they consider “too old” even when ink remains. This is a software issue, not a physical ink problem.
Try the cartridge in a different printer of the same model if available. If it works there, your printer’s memory is causing the issue. Some printers allow memory resets through button combinations during power-up. Search online for “[your printer model] reset ink memory” to find specific instructions.
For HP printers, removing the cartridge, turning off the printer, waiting 60 seconds, then restarting and reinstalling the cartridge often clears false error messages. Canon and Epson printers have similar reset procedures unique to their models. Be aware that resetting ink monitoring means you’ll lose accurate ink level tracking, so monitor print quality manually.
Best Practices for Storing Ink Cartridges
Proper storage dramatically extends the usable life of expired ink cartridges. Always store unopened cartridges in their original sealed packaging. The protective wrapping prevents air exposure that causes ink to dry and evaporate.
Keep cartridges in a cool, dark environment between 60-77°F (15-25°C). Extreme temperatures accelerate chemical breakdown. Avoid storage in garages, attics, or near windows where temperature fluctuates significantly. A climate-controlled closet or drawer is ideal.
Store cartridges upright in the same orientation they sit in your printer. This prevents ink from pooling incorrectly within the cartridge. If you must store them horizontally, place them nozzle-side up to reduce leaking risk.
For opened but partially used cartridges removed from your printer, place them in an airtight plastic bag or container with a slightly damp paper towel (not touching the cartridge). This maintains humidity and prevents nozzles from drying. Use these cartridges within 6 months for best results.
Label cartridges with removal dates so you can prioritize using the oldest first. This rotation system ensures you use cartridges before degradation becomes severe.
Common Mistakes When Handling Expired Ink

Mistake 1: Using Tap Water for Cleaning Many people use regular tap water for cartridge soaking, but minerals in tap water create new clogs while trying to fix old ones. Always use distilled or purified water. The small cost difference is worth avoiding additional problems.
Mistake 2: Excessive Cleaning Cycles Running five or six cleaning cycles consecutively wastes enormous amounts of ink and can actually worsen clogs by drying ink in feed channels. Limit yourself to two cycles per session with at least 30-minute breaks between attempts. Patience yields better results than aggressive repeated cleaning.
Mistake 3: Ignoring Print Quality Degradation Some users continue printing with degraded expired cartridges, producing poor-quality documents. If colors look wrong, prints are faded, or streaking persists after troubleshooting, it’s time to replace the cartridge. Using severely degraded ink can also damage printer components over time.
Mistake 4: Touching Nozzle Plates with Fingers Skin oils contaminate nozzles and create additional printing problems. Always use lint-free cloths, cotton swabs, or let soaking methods do the work. Never directly touch the small holes where ink exits.
Mistake 5: Reinstalling Wet Cartridges Installing cartridges before they’re completely dry causes electrical connection problems and can damage your printer’s circuitry. After any wet cleaning method, allow at least 2-3 hours of air drying, preferably overnight.
Environmental Considerations: Successfully reviving expired cartridges reduces waste. Americans discard 375 million cartridges annually, most ending up in landfills where they take 1,000 years to decompose. Even successfully using a cartridge a few months past its date contributes positively to environmental sustainability.
Frequently Asked Questions
Q1: How long can ink cartridges last after their expiration date? With proper storage, unopened ink cartridges typically remain usable for 6-12 months past their printed expiration date, sometimes longer. Opened cartridges used in printers have shorter lifespans, usually 3-6 months after removal. The key factors are storage conditions and whether the seal was broken. Well-stored expired ink cartridges often work perfectly two years past their dates.
Q2: Can expired ink damage my printer? Expired ink rarely damages printers. The main risk is severely dried ink creating permanent clogs in the printhead, particularly on printers with built-in (non-replaceable) printheads. This is why testing and cleaning are important. Color shifts or light printing won’t harm your printer, though they may produce unsatisfactory results requiring cartridge replacement.
Q3: Why do manufacturers put expiration dates on ink cartridges? Manufacturers use expiration dates primarily for quality assurance and liability protection. They guarantee optimal performance within the timeframe but don’t claim ink becomes useless afterward. Expiration dates also encourage regular purchases, benefiting manufacturers financially. These dates are conservative estimates—most ink remains functional considerably longer.
Q4: Should I buy discounted expired ink cartridges online? Buying heavily discounted expired cartridges can be cost-effective if you’re willing to troubleshoot. Check seller ratings and return policies first. Cartridges stored improperly may not revive despite your best efforts. If buying expired cartridges, look for those recently expired (within 6 months) and sold by reputable sellers. Avoid deals that seem unrealistically cheap, as these may be counterfeit or extremely old.

Conclusion
The myth that expired ink cartridges are automatically worthless costs consumers hundreds of dollars annually and contributes unnecessarily to environmental waste. As you’ve learned, expiration dates are conservative manufacturer guidelines rather than absolute deadlines, and most cartridges remain functional with simple troubleshooting techniques. By performing visual inspections, running cleaning cycles, using water or alcohol soaking methods, and applying manual priming techniques, you can successfully revive the majority of expired cartridges and achieve satisfactory print quality. Proper storage practices further extend cartridge lifespan, ensuring you get maximum value from every purchase. While some cartridges truly reach the end of their useful life, many others simply need minor intervention to work perfectly. Before automatically discarding that expired cartridge, invest 15-30 minutes trying these proven revival methods—you’ll often be pleasantly surprised by the results. Remember that print quality should be your ultimate guide: if revived cartridges produce acceptable results for your needs, there’s absolutely no reason to replace them based solely on an arbitrary date printed on the package.
Voice-Activated Printing: Ultimate Alexa & Google Setup Guide Read More


