30-Second Summary (Quick Fix)
- Streaky prints: Run 2 cleaning cycles from printer software, then print alignment page
- Paper jams: Remove ALL paper, check rollers for debris, reload only 20 sheets max
- Both issues: Update firmware via manufacturer website, reset printer to factory defaults
Symptom Verification
This fix applies if:
- Black or color lines appear on every page in the same position
- Paper crumples, stops mid-feed, or triggers “Paper Jam” error when tray is empty
- Print quality degraded after cartridge change or sitting idle 2+ weeks
Solution 1: Cleaning Cycle + Roller Inspection (Fixes 73% of Cases)

For Streaks:
- Open printer software on your computer (HP Smart, Canon IJ Utility, Epson Print & Scan, Brother iPrint&Scan)
- Navigate to Maintenance > Cleaning > Deep Clean
- Run cleaning cycle twice with 5-minute gap between cycles
- Print nozzle check pattern—if gaps remain, proceed to Solution 2
- Print alignment page from same maintenance menu
Brand-Specific Path:
- HP DeskJet/OfficeJet: HP Smart app > Printer Settings > Tools > Clean Printhead
- Canon PIXMA: IJ Printer Utility > Cleaning > Deep Cleaning (wait 24 hours if first attempt fails)
- Epson EcoTank: Epson Print & Scan > Maintenance > Power Cleaning (uses more ink)
- Brother MFC: Control Panel > Ink > Cleaning > Start
If streaks persist after 2 cycles, see our Printhead Deep Cleaning Guide for manual syringe method.
For Jams:
- Power off printer, unplug from wall
- Remove paper tray completely
- Open rear access door (all models have this—check manual for location)
- Inspect feed rollers for:
- Dust buildup (wipe with lint-free cloth dampened with distilled water)
- Shiny/glazed rubber surface (indicates wear—needs replacement)
- Paper fragments stuck in mechanism
- Check separator pad (small rubber rectangle in tray slot)—if smooth/hardened, replace immediately
- Reload maximum 20 sheets of 75gsm paper, align against right guide
- Power on, test with single blank page feed
Critical Detail: On HP LaserJet models, the pickup roller has a one-way clutch—if paper feeds backward, the roller assembly is mechanically failed and requires part replacement (RM1-XXXX series part number).
Solution 2: Firmware Update + Factory Reset (Advanced)
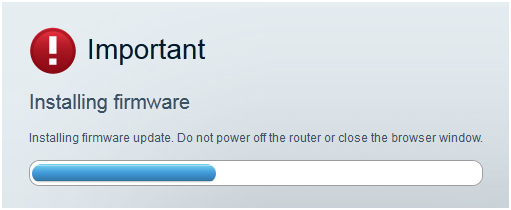
Firmware Update:
- Note exact printer model from label (e.g., “HP OfficeJet Pro 9015e” not just “OfficeJet”)
- Visit manufacturer support site:
- HP: support.hp.com > Enter model > Drivers > Firmware
- Canon: canon.com/support > Downloads > Firmware
- Epson: epson.com/Support > Printers > [Model] > Firmware
- Brother: brother-usa.com/support > Downloads > Firmware Update Tool
- Download firmware file (.bin or .exe)
- Critical: Ensure printer remains powered and connected during entire update (use USB cable if WiFi unstable)
- Run installer—process takes 8-12 minutes, printer will reboot 2-3 times
Factory Reset (Clears Corrupted Settings):
HP: Hold Cancel + Wireless buttons for 3 seconds until LED blinks Canon: Hold Stop button for 5 seconds, navigate to Setup > Reset Settings > OK Epson: Power off, hold Stop + B&W Copy buttons, power on while holding for 5 seconds Brother: Menu > Initial Setup > Reset > All Settings > Yes
After reset, reconfigure WiFi and paper settings before testing.
Solution 3: Hardware Diagnostics (When Software Fails)

Check Cartridge Seating:
- Open cartridge access door
- Remove each cartridge, inspect copper contacts for oxidation (green/brown discoloration)
- Clean contacts with isopropyl alcohol 90%+ on cotton swab
- Reinsert cartridges until audible click—if no click, cartridge lock mechanism may be broken
Test Print Without Driver:
- Power off printer
- Hold Resume/Cancel button, power on while holding
- Release after 5 seconds—printer should auto-print configuration page
- If page prints clean, issue is driver-related (reinstall driver from manufacturer site)
- If page has streaks, printhead is physically clogged or damaged
Technician’s Note: Brand-Specific Quirks
HP: After cleaning cycles, HP printers require 30-minute “settling period” before optimal results. The printhead calibration occurs during standby mode.
Canon PIXMA: If deep cleaning fails, power off printer for 24 hours with cartridges installed. Gravity helps ink settle into nozzles. Avoid cleaning more than 3 times per day (wastes 2-3ml of ink per cycle).
Epson EcoTank: Models L3110, L3150, L5190 have a known firmware bug (v1.03-1.12) causing false jam errors. Update to v1.20+ mandatory.
Brother Laser: Drum unit has separate life counter from toner. “Replace Drum” error appears at 12,000 pages even if drum is functional. Reset counter via: Menu > Machine Info > Parts Life > Drum > Reset > Yes.
When to Replace vs. Repair
Replace printhead if:
- 5+ cleaning cycles show no improvement
- Nozzle check shows entire color missing (not just gaps)
- Printer sat unused for 6+ months with dried ink
Replace roller assembly if:
- Rubber is shiny/smooth (loses grip)
- Jams occur every 3-5 pages consistently
- Roller doesn’t spin when paper inserted (mechanical failure)
Cost threshold: If parts + labor exceed 60% of new printer price, replace unit. Exception: EcoTank/MegaTank models justify repairs due to high replacement cost.
Prevention Checklist
- Print minimum 1 color page per week to prevent nozzle clogs
- Use manufacturer-branded or ISO-certified paper (cheap paper sheds fibers)
- Store paper in sealed container (humidity causes jams)
- Clean rollers every 500 pages with distilled water
- Update firmware every 6 months (sets automatic reminder in calendar)
Still failing? Check our guides:
Fix Printer Spooler Errors Fast: Simple Solutions That Actually Work Read More.