
Introduction
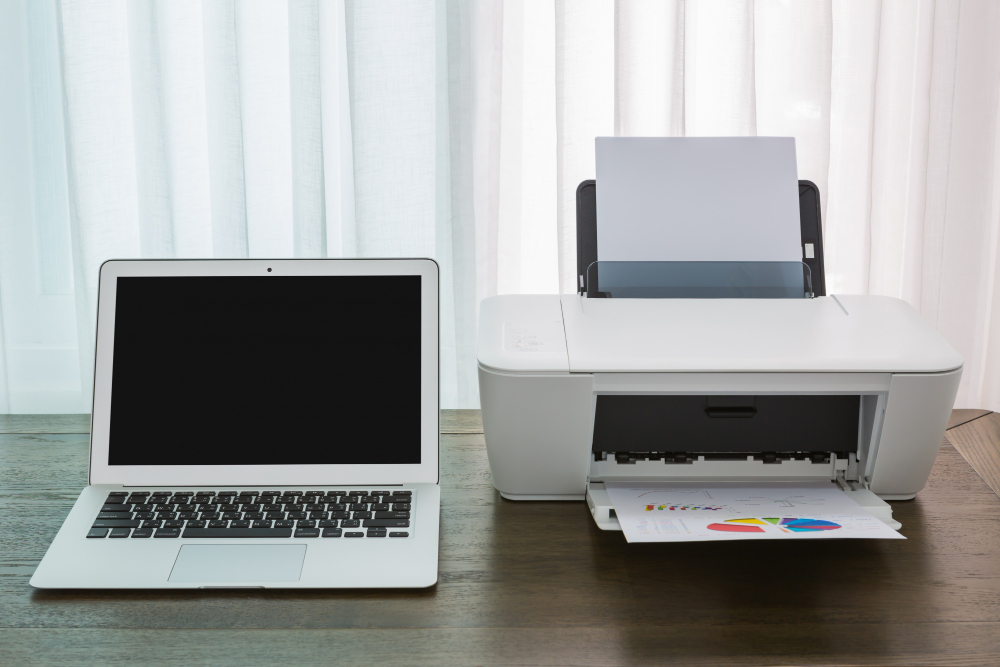
In today’s fast-paced digital world, efficiently connecting your printer to your laptop can save valuable time and reduce unnecessary frustration. Whether you’ve purchased a new printer, moved to a new location, or simply need to connect to a different device, establishing this connection shouldn’t require technical expertise or hours of troubleshooting. The good news is that modern printers are designed with user-friendly setup processes. This comprehensive guide will walk you through multiple methods to connect printer to laptop quickly and efficiently—all achievable within five minutes. By following these straightforward instructions, you’ll be printing documents, photos, and other materials from your laptop with minimal delay and maximum convenience.
What Is Printer-to-Laptop Connectivity?
Printer-to-laptop connectivity refers to the establishment of a functional communication link between your laptop and printer that enables data transfer for printing documents. This connection can take several forms, each with distinct advantages and setup requirements.
The most common connection methods include:
- USB Connection: A direct physical connection using a USB cable that links your printer directly to your laptop. This method is straightforward, reliable, and doesn’t require network connectivity.
- Wireless Connection: Establishes communication over your Wi-Fi network, allowing your laptop to send print jobs to the printer without physical cables. This provides flexibility in printer placement and enables multiple devices to connect.
- Bluetooth Connection: Uses Bluetooth technology to create a wireless connection between compatible printers and laptops. This is useful for portable printing situations where Wi-Fi isn’t available.
- Network/Ethernet Connection: Connects the printer directly to your router via an Ethernet cable, making it accessible to all devices on the network, including your laptop.
Each connection type offers different benefits depending on your specific needs. USB connections provide simplicity and reliability, while wireless options offer convenience and flexibility for multi-device households. Understanding these connection types is crucial for choosing the most appropriate laptop printer setup method for your particular situation and environment.
8 Easy Methods to Connect a Printer to Your Laptop in Under 5 Minutes
Follow these eight proven methods to quickly establish a connection between your printer and laptop, regardless of your technical expertise level.
Method 1: Direct USB Connection (Plug and Play)
The simplest and most reliable method to connect printer to laptop is via USB cable:
- Ensure your printer is powered on and has ink/toner installed
- Locate the USB cable (typically included with your printer)
- Connect one end of the USB cable to the printer’s USB port
- Connect the other end to an available USB port on your laptop
- Wait for your laptop to automatically detect the new hardware (usually 30-60 seconds)
- Follow any on-screen prompts to complete the installation
Most modern Windows and macOS systems will automatically install basic drivers, making this a true plug-and-play experience. For specialized printer features, you may need to install the manufacturer’s software, but basic printing functionality should be available immediately.
Method 2: Wireless Connection via Wi-Fi Protected Setup (WPS)
For printers with Wi-Fi capability, WPS offers the fastest wireless setup:
- Ensure your laptop is connected to your home Wi-Fi network
- Power on your printer and navigate to its wireless setup menu
- Select the WPS option on your printer’s control panel
- Press the WPS button on your wireless router when prompted
- Wait for the connection to establish (typically under 2 minutes)
- On your laptop, go to Settings > Devices > Printers & scanners
- Click “Add a printer or scanner” and select your printer from the discovered devices
WPS creates a secure connection without manually entering network credentials, significantly streamlining the laptop printer setup process for wireless printing.
Method 3: Connecting via Printer Installation Software
Manufacturer-provided software often offers the most comprehensive setup experience:
- Download the latest printer software from the manufacturer’s website
- Close any other applications on your laptop for a smoother installation
- Run the installation program and follow the on-screen instructions
- When prompted, select your preferred connection method (USB, Wi-Fi, etc.)
- Allow the software to detect your printer and establish the connection
- Complete any registration or optional settings as desired
This method ensures you have access to all printer features and provides the most up-to-date drivers for optimal performance.
Method 4: Direct Wireless Setup (Without Router)
Some printers support direct wireless connections without requiring a router:
- Access your printer’s control panel and navigate to network settings
- Enable “Direct Wireless,” “Wi-Fi Direct,” or similarly named feature
- Note the direct network name (SSID) displayed on the printer
- On your laptop, open Wi-Fi settings and connect to the printer’s network
- Open your browser and enter the printer’s IP address (typically displayed on the printer or in its documentation)
- Complete the setup through the printer’s web interface
This method is particularly useful in environments without Wi-Fi networks or when traveling with a portable printer.
Method 5: Bluetooth Connection
For Bluetooth-enabled printers and laptops:
- Turn on Bluetooth on both your printer and laptop
- On your printer, make it discoverable (refer to the printer manual)
- On your laptop, go to Settings > Devices > Bluetooth & other devices
- Click “Add Bluetooth or other device” and select your printer from the list
- Follow any pairing instructions (you may need to enter or confirm a pairing code)
- Once paired, add the printer through Settings > Devices > Printers & scanners
Bluetooth connections work well for short-range printing needs and situations where Wi-Fi isn’t available.
Method 6: Network/Ethernet Connection
For printers with an Ethernet port:
- Connect one end of an Ethernet cable to your printer
- Connect the other end to an available port on your router
- Power on your printer and wait for it to acquire a network address
- On your laptop, go to Settings > Devices > Printers & scanners
- Click “Add a printer or scanner” and wait for your printer to appear
- Select your printer from the list and follow any additional prompts
This wired network approach provides stable connectivity for office environments or situations where wireless reliability is a concern.
Method 7: Cloud Printing Services
Cloud printing allows you to connect printer to laptop via internet services:
- Ensure your printer supports cloud printing services (like HP ePrint, Epson Connect, etc.)
- Register your printer with the manufacturer’s cloud service following their instructions
- Install the corresponding app or service on your laptop
- Sign in with the same account credentials on both your printer and laptop
- Select your printer from the cloud-connected devices in the app
This method enables printing from anywhere with internet access, not just when on the same network.
Method 8: Operating System Built-in Tools
Both Windows and macOS offer built-in tools to find and add printers:
For Windows:
- Press Windows key + I to open Settings
- Navigate to Devices > Printers & scanners
- Click “Add a printer or scanner”
- Wait for available printers to appear and select yours
- Follow the on-screen instructions to complete setup
For macOS:
- Click the Apple menu and select System Preferences
- Click Printers & Scanners
- Click the (+) button below the printer list
- Select your printer from the list of available printers
- Click Add to complete the connection
These built-in tools often provide the quickest laptop printer setup for printers already connected to your network.
Essential Tools and Resources for Printer Connectivity
Several tools can enhance your printer connectivity experience and help troubleshoot potential issues:
Manufacturer Mobile Apps
Most major printer manufacturers offer companion apps that simplify setup:
- HP Smart: Guides you through printer setup and offers mobile printing capabilities
- Canon PRINT: Streamlines the connection process for Canon printers
- Epson iPrint: Provides easy setup and maintenance for Epson devices
- Brother iPrint&Scan: Offers connection utilities and printing options for Brother printers
These apps often provide additional features beyond basic connectivity, such as scanning, copying, and print quality adjustments.
Network Analysis Tools
For wireless connectivity issues, these tools can be invaluable:
- Network scanner apps: Help identify all devices on your network, including your printer’s IP address
- Signal strength analyzers: Determine if your printer has adequate Wi-Fi coverage
- Printer Network Utility: As recommended by PCMag, these utilities can diagnose connectivity problems
Driver Update Services
Keeping printer drivers current ensures optimal compatibility:
- Manufacturer update assistants that automatically check for new drivers
- Windows Update, which frequently includes printer driver updates
- Third-party driver management software that can identify outdated drivers
Using these resources alongside the connection methods described above will ensure your laptop printer setup process remains smooth and efficient.
Troubleshooting Common Printer Connection Problems
Even with straightforward connection methods, you might encounter occasional issues. Here are solutions to the most common problems when trying to connect printer to laptop:
Printer Not Detected by Laptop
If your laptop fails to discover your printer:
- Verify physical connections: Ensure cables are securely connected and the printer is powered on
- Check network compatibility: Confirm both devices are on the same network for wireless connections
- Restart devices: Power cycle your printer, laptop, and router to reset communication channels
- Verify printer visibility settings: Some printers have settings that can hide them from discovery
- Temporarily disable firewalls: Security software sometimes blocks printer detection
Driver Installation Failures
When printer drivers won’t install properly:
- Download directly from manufacturer: Avoid using generic drivers when possible
- Run installers as administrator: Right-click the installer and select “Run as administrator”
- Clear previous installation attempts: Use the manufacturer’s cleanup utility before retrying
- Check for operating system compatibility: Ensure the driver supports your specific laptop OS version
- Try universal print drivers: Many manufacturers offer simplified universal drivers that work for multiple models
Wireless Connection Instability
For unreliable wireless printing:
- Position optimally: Place your printer closer to your Wi-Fi router
- Update printer firmware: Check for and install any available firmware updates
- Assign static IP address: Configure your router to always assign the same IP to your printer
- Reduce interference: Keep printers away from microwave ovens, cordless phones, and other wireless devices
- Consider a wired connection: If wireless proves unreliable, a USB or Ethernet connection may be preferable
Printer Connected but Not Printing
When the connection is established but print jobs fail:
- Check printer status: Ensure it’s not in an error state or showing warnings
- Clear the print queue: Delete all pending jobs and restart the print spooler service
- Test with a printer self-test page: Determine if the issue is with the laptop connection or the printer itself
- Update all software: Ensure both printer drivers and operating system are fully updated
Addressing these common issues will resolve the vast majority of connection problems when trying to connect printer to laptop efficiently.
Frequently Asked Questions
Do I need to install drivers to connect my printer to my laptop?
Most modern operating systems include basic drivers for common printer functions, allowing plug-and-play functionality via USB connections. However, to access all printer features (advanced scanning, ink monitoring, maintenance functions), installing the manufacturer’s full driver package is recommended. For the best experience, visit the printer manufacturer’s website to download the latest drivers specific to your model and operating system.
Why won’t my laptop recognize my wireless printer even though they’re on the same network?
This typically occurs due to network discovery settings, firewall restrictions, or router configuration issues. Ensure your laptop’s network discovery is enabled, temporarily disable firewalls for testing, and verify your router doesn’t have client isolation or AP isolation enabled (features that prevent wireless devices from communicating with each other). Some printers also require specific network ports to be open, usually detailed in the manufacturer’s documentation.
Can I connect my printer to both a desktop computer and laptop simultaneously?
Yes, through several methods. Network/wireless printers can connect to multiple computers simultaneously over Wi-Fi or Ethernet. For USB printers, you can either manually switch the USB cable between computers or use a USB printer sharing device. Another option is to connect the printer to one computer and enable printer sharing through your operating system’s settings, allowing other computers on the network to access it.
How can I tell if my printer is successfully connected to my laptop?
After setup, verify the connection by checking your laptop’s printer list. On Windows, go to Settings > Devices > Printers & scanners, or on macOS, check System Preferences > Printers & Scanners. A successfully connected printer will appear with a “Ready” status. You can further confirm by printing a test page: right-click the printer from the list, select “Printer properties” or “Printer preferences,” and look for the “Print test page” option.
Conclusion
Connecting your printer to your laptop doesn’t need to be a time-consuming or technical process. By following the appropriate method for your specific printer type and preferences, you can establish this essential connection in under five minutes. The eight methods outlined in this guide cover virtually every connection scenario, from direct USB connections to cloud printing services, ensuring you have multiple options to achieve successful laptop printer setup.
Remember that the simplest solution is often the most effective—start with direct connections before attempting more complex wireless setups if you encounter difficulties. Keep your drivers and firmware updated to maintain optimal compatibility between your devices, and don’t hesitate to use the troubleshooting tips provided if you encounter any obstacles.
With your printer successfully connected to your laptop, you’ll enjoy the convenience of on-demand printing whenever you need it. This small investment of time creates a seamless workflow for your home office, business tasks, academic work, or creative projects. The days of complicated printer setup are firmly in the past—today’s connection processes prioritize user experience and efficiency, putting hassle-free printing within everyone’s reach.
Fix Printer Offline Problem on Windows 10/11 Learn More.


Recent Comments